Core includes the benefit of having an ever-expanding list of visual effect objects to work with, and thanks to the template system, we can combine these in even more unique ways to achieve whatever your vision may be.
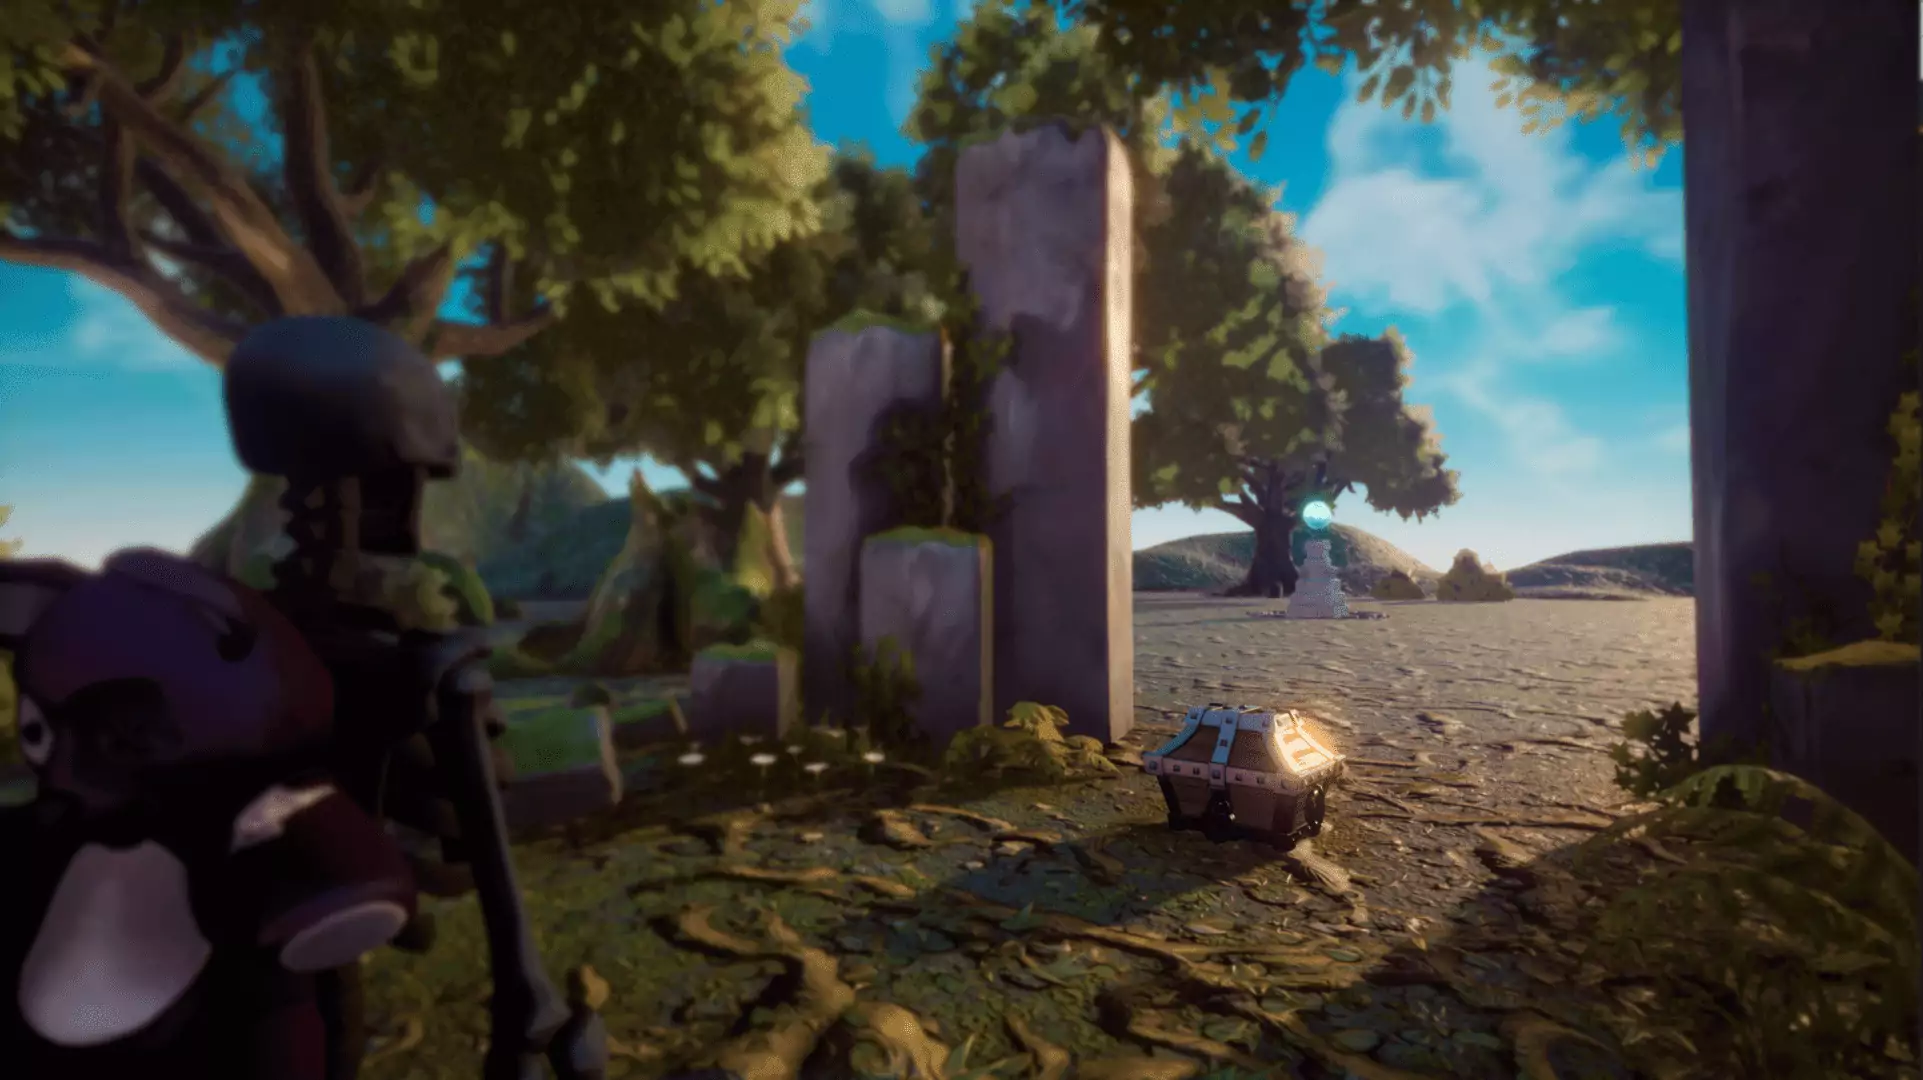
We’ll be making a treasure chest that requires an item to open!
Time to complete: 20 minutes
Knowledge Level: No knowledge required, but this tutorial will use some simple Lua scripting. If you’ve never programmed before, you might want to check out the Intro to Scripting first.
Skills you will gain:
how to play a visual effect on a trigger (at a specific moment)
how to play a sound effect on a trigger
how to use community content
how to give the player resources
how to combine visual effect objects with sound effects
To start, open up a new project or whatever project you’d like to make this treasure chest in.
Setting up the Treasure Chest
Add a Treasure Chest to the Project
Navigate to the Core Content window.
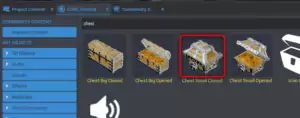
Type chest into the search bar within that window.
Click on and drag the Chest Small Closed into your project viewport.
Make a Treasure Chest Group
Right click that chest in your project Hierarchy, and click “New Group Containing This”. Name this group “Treasure Chest”. The transform data on the Small Chest Closed (seen in the Properties window while the object is selected) should now be all at default of 0,0,0. All the position data should now be on the parent group that we just created.
Next, drag a Small Chest Opened from Core Content into that group we created. This will place the opened chest in the exact same spot as the closed chest.
Right click on the “Treasure Chest” group and select “Enable Networking”.
Make the Opened Chest Invisible
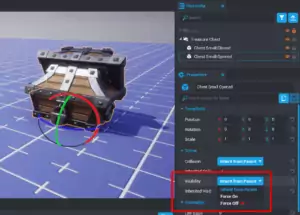
With the Chest Small Opened selected in the project Hierarchy, navigate to the Properties window.
Scroll down to the section called Scene. In here, change the setting for Visibility from Inherit from Parent to Force Off. We’re going to hide this chest and unhide it later when we want the chest to be opened.
Add A Script and a Trigger
Click the button at the top left of the Core Editor to create a new script; let’s call it TreasureChest. Drag this script into your TreasureChest group in the Hierarchy.
In the Core Content window, search for “trigger”. Click and drag the object that shows up into the TreasureChest group in your project Hierarchy.
With the Trigger selected in the Hierarchy, check out the Properties window. Scroll down to the Gameplay section.
Find the Interactable property. Turn this on.
Interactable Triggers
A trigger can operate in two distinct ways. If Interactable is on, it will turn into a player-confirmed switch. This means the player will have to walk up to it and press F to cause the trigger to activate its functions. This works perfectly for things like switches or dialogue.
If Interactable is off, the functions connected to the trigger will happen instantly whenever a player simply walks into a trigger. This case is more useful for things like traps, or in general things you don’t want the player to know about or have to think about activating.
Label the Interaction
In the Interaction Label property, type Open.
At this stage, if you press play to try it out, you’ll notice that walking up to the treasure chest prompts you to press F to open the chest, but when you press it nothing happens. Press V to toggle gizmos on and off to see both the spawn point and the trigger we created.
Open Treasure Chest Script
In order to use that trigger in our script, we need to access it.
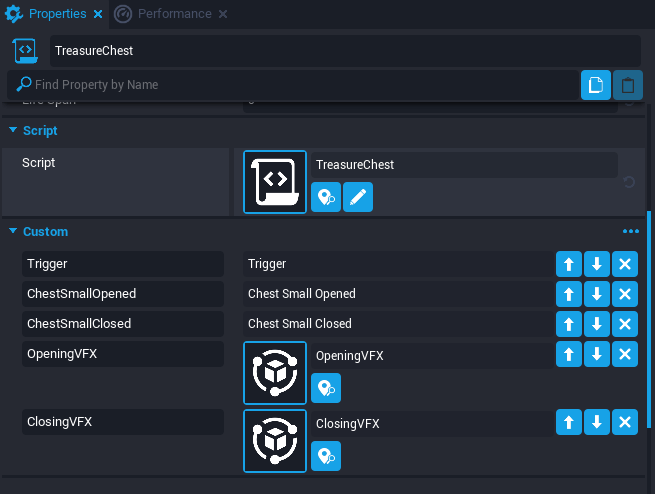
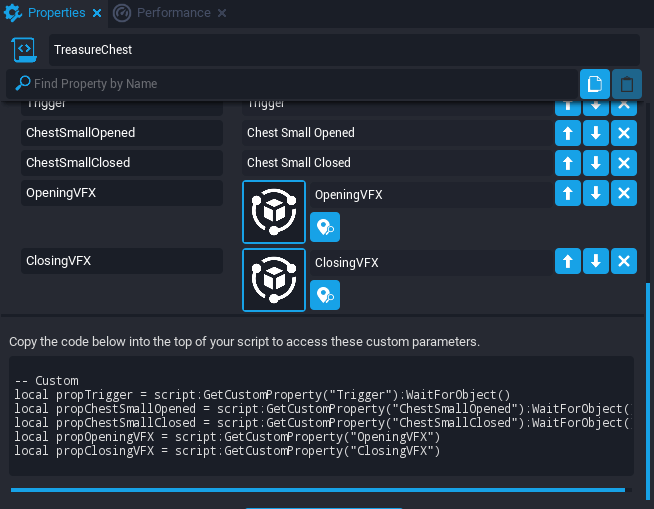
Select your TreasureChest script in the Hierarchy. While it is selected, click and drag the trigger onto the Properties window for the script. This adds the trigger as a Custom Property on the TreasureChest script. Custom properties are wonderfully simple ways to use any part of the project or hierarchy that you need to in your code.
Do this same action–dragging the objects from the Hierarchy into the script Properties window–for the Chest Small Opened and the Chest Small Closed.
Add Custom Properties to the Script
We need two other custom properties on our script.
At the bottom of the Properties window, click the “Add Custom Property” button.
Choose the type AssetReference, as we’ll be adding something here that we haven’t created yet.
Name this one OpeningVFX, and the second one (also an AssetReference type) LockedVFX.
Now that we’ve got everything we need, double click the TreasureChest script to open it up!
Create References to Custom Properties
When you add a custom property to a script, Core generates a line of code that can be copied and pasted into the script to reference that object. Below the custom property of the trigger, you should see:
Right click in this black box of text, and click select all, then again and click copy.
Open the TreasureChest script, right click to paste everything in there.
Check Script Variables
With all these variables pasted in, your script should look like this:
local propTrigger = script:GetCustomProperty("Trigger"):WaitForObject()
local propChestSmallOpened = script:GetCustomProperty("ChestSmallOpened"):WaitForObject()
local propChestSmallClosed = script:GetCustomProperty("ChestSmallClosed"):WaitForObject()
local propOpeningVFX = script:GetCustomProperty("OpeningVFX")
local propLockedVFX = script:GetCustomProperty("LockedVFX")Code language:Lua(lua)
In your script, beneath all those variables we just pasted in, add this code:
localfunctionOnSwitchInteraction(theTrigger, player)
UI.PrintToScreen("Hi! You've triggered an event.")
endCode language:Lua(lua)
Right now all this does is print directly on our screen the message we type in. This is a useful technique to make sure functions are being called at the time you expect.
Connect the Function to an Event
Now we have the function, but in order for it to work when we press play, it needs to be connected to the event called interactedEvent of the trigger.
Copy this code into the end of your script to call the function when the trigger is interacted with:
Press Play, walk up to the treasure chest and interact with it by pressing F. The message should appear on the screen,Next we will make the chest open only when you have the item that unlocks it.
Creating a Pickup to Unlock the Chest
Search Community Content
Community Content is an insanely valuable resource for making your life easier. Other users (and even you too if you want!) post creations that they have made for anyone to use. This helps people who prefer to program still have quality and varied art models to use in their games, and art people who need coding help the types of resources to do that. In our case, we want an item the player can pick up. Luckily, there is something like that already on Community Content!
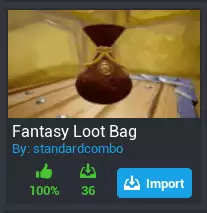
Navigate to the Community Content tab. Type loot into the search bar, and import the Fantasy Loot Bag by standardcombo. We’re going to repurpose this!
Import the Loot Bag
Click over to the Core Content tab. You’ll see an Imported Content section, and within it, the Fantasy Loot Bag!
Click this to drag the green Loot Bag object into the Main Viewport or Hierarchy.
Test Out the Loot Bag
Press play to check out how it works by default!
When you walk up to it, it will prompt you with Press F to pick up. There is a sound effect and flash of light that happens while your character does an animation to grab it. Depending on where the Loot Bag is in relation to the player, a different animation will play.
There are several things we’re going to change about the Loot Bag to suit our needs here with the Treasure Chest.
Change the Pickup Trigger
Click the Loot Bag in the Hierarchy, and drop down the folder structure to see the contents.
We’re looking for the Trigger right now. Click this, and open the Properties window.
Scroll down to the Gameplay section, and uncheck the box for Interactable.
Now when a player walks over it, they will instantly grab it rather than having to press F first.
Change the Object
We can use whatever art we want in this object, so instead of a coin pouch let’s try… a crowbar. For prying that chest open with!
Beneath that trigger, find the ClientContext folder.
Within this folder are all the objects that make up the visual component of the Loot Bag. Don’t delete the whole folder, but delete all of the content so that we can start fresh.
Accept to Deinstance when the popup window appears, this happens because we are making physical changes to the template.
Open the Core Content tab, and type “crowbar” into the search box. Drag the red object that shows up into the ClientContext folder that we just emptied. Now our Loot Bag is a crowbar!
Check that all the transforms on the Client Context folder are at 0,0,0 to be sure the crowbar is at the right size and location.
Change the Resource Name
The only other important thing we’ll want to change is on the main root folder of the Loot Bag object.One of the custom properties is called ResourceName. By default it is “Gold” and therefore that’s what resource is given to the player when they pick it up. Change the name to reflect the new resource, Crowbar!
Now when walking up the crowbar, the player will automatically pick it up!
Creating a Pickup Effect Template
The pickup still plays the coin sound effect and that feels pretty weird with this object. So, let’s create a new effect to play!
Create a Networked Folder
To start creating an effects template, let’s create a folder.
Right click in the empty space of the Hierarchy to create a New Folder. Name it CrowbarPickupFX.
In Core Content, search “step metal hollow” and drag the Footstep Metal Hollow 01 SFX onto that new folder we made.
Next look up “gear movement shuffle light” in Core Content and drag Gear Movement Shuffle Light 01 SFX into the folder as well.
Right click the CrowbarPickupFX folder, and select “Enable Networking” to enable this and all children to be networked. This means the state of it is known by the server, and all game clients
Customize the Sound Effects
Select both of those sound effects we added at once, and in the Properties window, turn the Auto Play box on. We want these sounds to play the moment they are created.
The top right of the Properties window includes a play button for testing a sound. If you turn Apply Effects on, it will take into account whatever you change about the properties.
Scroll up a bit in the Properties window, and set the Life Span to 2.
Save the Template
Now we’ve got it all set! To use it in other places, we’re going to make it into a template.
Right click the root folder, and select Create New Template from This. Now we have a custom sound effect template to use anywhere!
Since all templates in the Hierarchy are only instances of a template saved into Project Content, we can delete this one.
Spawn the Sound Effect at the Right Moment
Click back onto the Loot Bag object. In the Properties window, notice the custom property PickupFX.
In the Project Content window, find your new CrowbarPickupFX template. Drag this into that custom property on the Loot Bag.
Now when you press play to test, it should play your new sound effect when picking up the crowbar. Ta-da!
Now we come back to scripting. We need to make sure the player has the crowbar when trying to open the treasure chest in our interaction code we wrote earlier. Replace all the code of your OnSwitchInteraction function with this:
This adds an if statement inside our trigger. If the player has a crowbar, then it will take that crowbar away from the player and swap which chest is visible, effectively switching to the open treasure chest form. If the player has zero or less crowbars (if it were physically possible to have negative crowbars), it prints that out onto the screen.
Now we just want to make sure that our TreasureChest root group has networking enabled. Right click it to enable this.
Creating the Opening and Locked Effects
Create Folders for the Opening and Locked Effects
Create two new folders in the project Hierarchy by right clicking in the open space. Name one OpenedFX and the other LockedFX.
We’ll start with the opening effect. In Core Content, search for “health spiral”. Drag what shows up into the OpenedFX group–We’re gonna modify some properties on it to use. All of these settings will be found in the Properties window with the Health Spiral VFX selected in the project Hierarchy.
Customize the Opening Effects
Scroll down to the section called “Smart” and change the Radius to 7.5 to be wider.
Increase the Spiral Speed to 8.
Set the Ring Life to 1. So we’ve got a neat visual effect now!
Now we need some sound effects: search for Meta Fantasy Treasure 01 SFX in Core Content and the Object Fantasy Treasure Chest Open 01 SFX and drag each one into the OpenedFX folder.
Select both of these effects in the Hierarchy, and turn Autoplay on for both in the Properties window.
Give each one a Life Span of 2.
Make the Opening Effects Template
Now that we’ve got all the contents of our new effect set up, we need to enable networking on its root folder via the right-click menu.
Right click this group and create a template from it. After making it into a template, delete it from the project Hierarchy.
Click back onto the TreasureChest script from earlier. Drag your new effect into the custom property for the OpeningVFX on the TreasureChest script.
Spawn the Opening Effects in Code
By adding this new code to spawn our effect and destroy the trigger, your function should look like this:
Notice that we are destroying the trigger at this step so we don’t need to worry about interacting with it twice or seeing the Open text after it has opened
Test it out! Now the opening effect that we made should play when opening the chest. This helps the action to feel more intentional and rewarding as a player. Now we’ve got a sparkly little opening effect!
Create the Locked Effect
Next let’s create the LockedFX for when a player tries to open the chest without having the crowbar first.
In Core Content, search for “impact lines” and drag the result into your LockedFX folder. This gives us a visual component.
Next search Core Content for a Mechanical Gear Lock 01 to be the audio part of this effect. Drag it into the LockedFX folder.
Change this audio object Auto Play property to on.
Now we’ve got all the parts, but we need to enable networking on the root folder first via the right-click menu.
Right click to turn this LockedFX object into a new template.
Just like before, delete this first instance from your project Hierarchy. Click that TreasureChest script and drag our new LockedFX template into the custom property we created called LockedFX.
Use the Locked Effect When the Player Doesn’t Have the Crowbar
We want this LockedFX template to spawn when the player doesn’t have a crowbar, so let’s replace the UI.PrintToScreen() line with lines to spawn the template.
This will make your whole OnSwitchInteraction() function look like this:
This makes it easier to tell that the player is indeed interacting with the chest–just not in the right way.
Now you’ve got some basic effects set up for your treasure chest! You have learned how to create effect templates by combining various visual effects with sound effects, and how to spawn them at specific times! Go forth, and make more awesome stuff.
More Tips & Info
In most cases you won’t need to code to use the visual effects in Core. Oftentimes templates will have a custom property for more effect templates, so you can make your own effects as templates and just drag and drop them into other content–just like the Fantasy Loot Bag we used.
There are so many ways that you can make effects unique. By combining several of them, changing their properties dramatically, and using them connected through code you can change the timing and positions of effects in whatever ways you can dream up.
It’s a good course, but I have a problem with the code and the chest, they don’t work. I do everything in this lesson and the chest doesn’t open with the crowbar. I need help, please.
I followed it quickly just to see, and there is an important step missing that I have added to the “Make a Treasure Chest Group” section towards the top.
3. Right click on the “Treasure Chest” group and select “Enable Networking”
This website uses cookies so that we can provide you with the best user experience possible. Cookie information is stored in your browser and performs functions such as recognising you when you return to our website and helping our team to understand which sections of the website you find most interesting and useful.
Strictly Necessary Cookies
Strictly Necessary Cookie should be enabled at all times so that we can save your preferences for cookie settings.
If you disable this cookie, we will not be able to save your preferences. This means that every time you visit this website you will need to enable or disable cookies again.
3rd Party Cookies
This website uses Google Analytics to collect anonymous information such as the number of visitors to the site, and the most popular pages.
Keeping this cookie enabled helps us to improve our website.
Please enable Strictly Necessary Cookies first so that we can save your preferences!

It’s a good course, but I have a problem with the code and the chest, they don’t work. I do everything in this lesson and the chest doesn’t open with the crowbar. I need help, please.
Same
Did you ever find the solution?
See my reply to maxfarcry 🙂
I followed it quickly just to see, and there is an important step missing that I have added to the “Make a Treasure Chest Group” section towards the top.
3. Right click on the “Treasure Chest” group and select “Enable Networking”