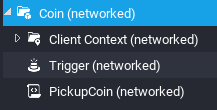
In this lesson, we are making the resource that players will collect in the game. Create a new group called Coin. This is the root of our template and it will contain several children, including the Trigger to detect the player, the Script to give a resource, and the Client Context that contains the visual aspect of the Coin and the animation. This type of object is already available as Resource Pickup in the Core Content tab but let’s make that from scratch for educational purposes.
The coin that the player must collect on the map
Aspect of the Resource
When you place an object in your scene, it is placed by default in the Default Context, a context that is shared between the server (handling collision) and the client (handling the visual aspect). Adding objects in the Client Context is one way to optimize your game because it will only exist on the client-side, meaning that the server won’t have to exactly synchronize the visual aspect of the Resource for all the players. All objects placed in the Client Context have collisions turned off because collisions are handled by the server.
Step-by-step
Create a group called Coin (CTRL + G or right click in the Hierarchy > New Group)
Create a new Client Context inside the Coin group.
Create a group called Geo (for Geometry). This is a term that most of the content made on the platform uses. A Geo group is a Client Context child that contains all the visual aspects of an asset. This can be useful if you are kitbashing a coin with several assets, you can drag everything inside the Geo group to keep the hierarchy clean and organized.
Update the Z position of the Geo to 100 so that the Coin position is on the ground but the coin will appear 100 units higher.
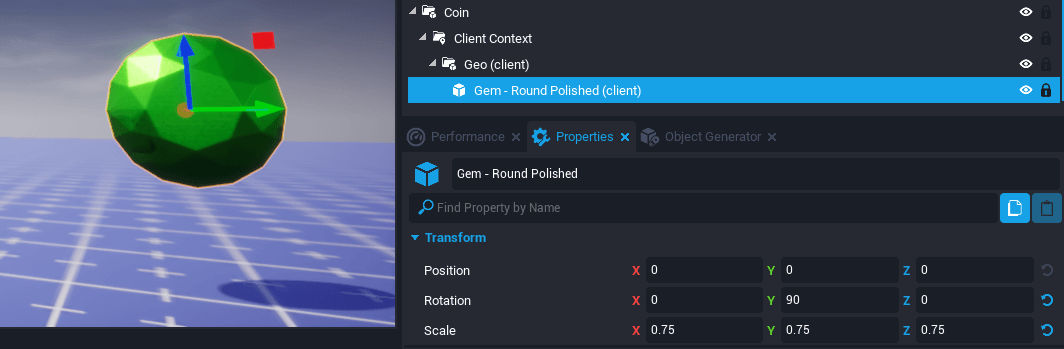
Kitbash a new object to be used as the coin inside the Geo group. Here, we used a simple object, the “Gem – Round Polished” object and rotated it by 90 degrees.
Create a New Client Context Kitbashed Coin with the Gold Material and the Color Override set to Green
Rotate the coin and make it float
Rotating
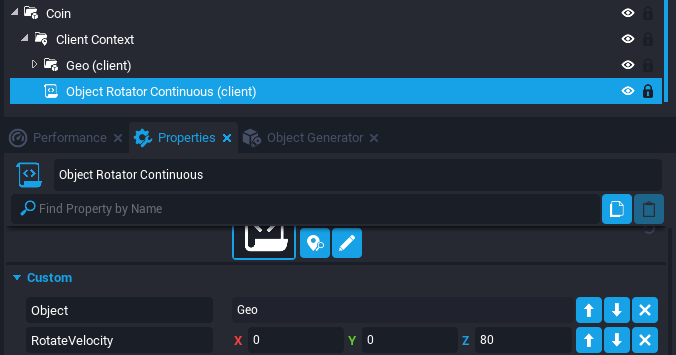
To rotate the coin, we are using the Object Rotator Continuous, a script that is available in the Core Content tab.
Search “Object Rotator Continuous” in the Core Content tab, then drag & drop it on the Client Context so that it is next to the Geo Group.
Open the Properties of the Object Rotator Continuous script and change the Z value of the RotateVelocity to 80.
Drag the Geo object from the Hierarchy to the Object Custom Property.
Properties of the Object Rotator ContinuousResult of the Rotator script
Floating
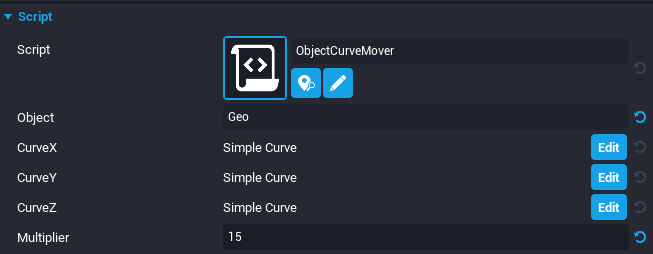
To make the coin go up and down, we are using the Object Curve Mover, a script that is also available in the Core Content tab.
Search “Object Curve Mover” in the Core Contenttab, then drag & drop it on the Client Context so that it is next to the Geo Group and the Object Rotator Continuous.
Open the Properties of the Object Curve Mover script and edit Multiplier to use the value 15. This will reduce the vertical movement of the coin.
Drag the Geo object from the Hierarchy to the Object Custom Property.
Properties of the Object Curve MoverFinal result
Server Logic
Trigger
To detect that the player is on the coin, we are using a trigger.
Type “Trigger” in the Core Content search bar.
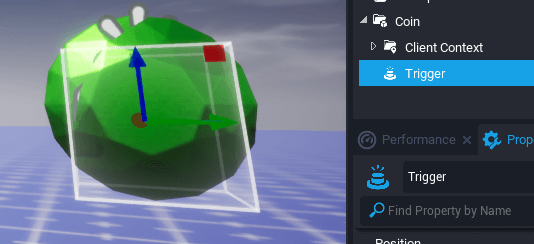
Add a Trigger as a child of the Coin. Do not put the Trigger in the Client Context, we want to detect the player from the server.
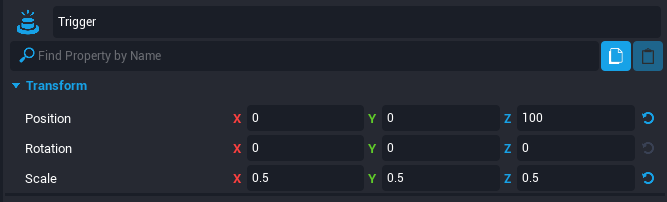
Set the Z position to 100 to be aligned with the coin.
Press V if you can’t see the white box (Gizmo) in your editor representing the area of the Trigger.
Adjust the area of the Trigger to match the coin. This area is not rotating (only the Geo in the Client Context is rotating) so don’t flatten the Trigger to exactly match the coin, keep the square shape.
Script
Now that the Trigger is positioned to detect the player, we can get the Object Reference of this object in a new Script and detect if a player collides with it. Before diving into the script, let’s talk about two important notions to understand with Core: Object Reference and Events.
Object Reference
An Object Reference is a variable in your script that contains all the information of an object placed in the scene. All objects in your scene are Core Objects. The Trigger that you placed is a Core Object and a Trigger. It means that you can access all the properties and functions available in a Core Object and in a Trigger. A Player is another type of Core Object but you can’t look at the “isInteractable” field of a player as this is only something available on a Trigger.
Once you have your Object Reference, you can read the properties and even change them by updating the values or calling some functions. For example, SetWorldPosition to change the position of an object.
To find all the properties, functions, and events tied to a specific type, use the Core API and click on the Types on the left.
Events
Using an Object Reference to connect an Event
Let’s write the script that detects the player, increases a resource by one, and destroys the coin.
Create a new script by right clicking on the Coin group and call it “PickupCoin”.
Select the Script in the Hierarchy and drag & drop the Trigger in the Custom Properties.
The last step of this tutorial is to paste this script:
Double-click on the script and paste that code:
-- Get the reference of the Trigger in the Custom Property and save it in the variable TRIGGER.local TRIGGER = script:GetCustomProperty("Trigger"):WaitForObject()
-- Get the reference of the parent of the script, which is the group Coin, the root of our object.local COIN = script.parent
-- The function that is called when the event beginOverlapEvent is fired, when an object or a player enters a triggerfunctionOnBeginOverlap(trigger, player)-- If the object player is not a player (can happen if another object enters the Trigger), return (meaning stop the function)ifnot player:IsA("Player") thenreturnend-- Now that we know that player is a Player object, call AddResource to add 1 resource "Coins" to the player
player:AddResource("Coins", 1)
-- Destroy the group Coin, destroying all the children including this instance of the script.
COIN:Destroy()
end-- This line connect the beginOverlapEvent fired when something enters the Trigger and the function OnBeginOverlap.-- Whenever someone enters the Trigger, the engine will call OnBeginOverlap with the name of the trigger and the object that just entered.
TRIGGER.beginOverlapEvent:Connect(OnBeginOverlap)Code language:Lua(lua)
If you try to start the game and pick the coin, this error will appear in the Event Log (click on Window > Event Log to see the errors):
“Error running Lua task: PickupCoin:16: Attempted to modify a field on a non-networked object. (Try marking the object as Networked or move it into a Client Context or Server Context to fix this problem.) Field: Destroy, Object: Coin”
This is a really common error that happens when a script tries to update or destroy an object that is not networked. To fix this, right-click on the “COin” object in the Hierarchy and click on “Enable Networking“. But what is a networked object?
By default, Core Objects are placed in a context called default where their properties can’t be updated from a script. You can’t change the color, move or destroy an object that is in the Default Context. The two options we have to move an object is to place that object in a Client Context (we just did that at the beginning of the lesson) or to Enable Networking on the object. This will synchronize the object with all the players through the network. If you Enable Networking on an object, you can actually update the object from the Object Reference. For example, you call the Destroy function that removes the objects. You can’t do that if the object is not networked.
This notion of Networked Objects is one of the most difficult things to comprehend as a beginner so what you should remember is:
Objects are by default in a Default Context and they can’t be moved, destroyed, or updated from a script.
By placing an object in a Client Context, we can move them from a script that is also in a Client Context but it won’t be synchronized with all the players. This is mainly used for visual effects, sound effects and everything that is not critical for the game.
By enabling networking, we can move or destroy the object (that is now in the Networked context) from a script. That object will be now updated/destroyed for all the other players.
One last thing: Networked Objects are resource heavy for your game and can induce lags. Keep that number low and use the Client Context whenever you just want to make something that is part of the visual effects of your game, not the main mechanics.
Creating the template
Now that the coin is working as expected, we need to create a template to spawn it from a script. As we are using the Object Rotator Continuous and the Object Curve Mover, we need to deinstance those two objects before creating our template. The reason is we don’t want these objects to keep track of the changes that occur to their templates.
Select the two blue scripts in the Hierarchy and select Deinstance These Objects
Right click on the Coin and Create a New Template From This.
Drag & Drop four Coins from Your Templates in your Project Content into your map
Press Play and collect the coins.
The networked template.Picking up the Coins
Resource Display
In order to know how many gems the player has, we can use a template available in the Core Content tab called Resource Display. Here is how you can integrate it into your scene:
Search “Resource Display” in the Core Content and drag & drop it in the scene.
Click on the object and change the Custom Property “ResourceName” from “Gems” to “Coins”.
Check the “AlwaysShow” option to always show the UI.
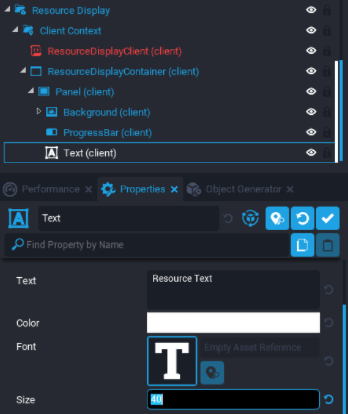
Open the content in the Hierarchy and find the Text to change the Font Size to 40.
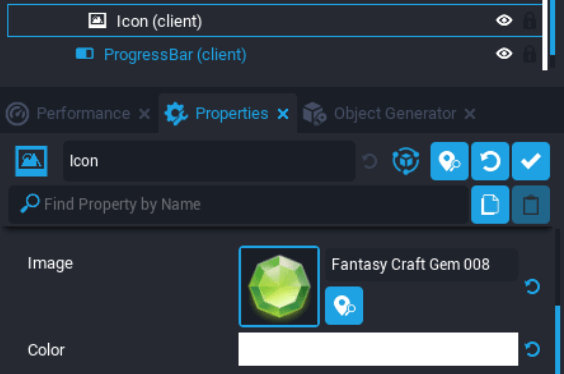
Change the Icon of the Resource Display, which is the child of the Background.
This website uses cookies so that we can provide you with the best user experience possible. Cookie information is stored in your browser and performs functions such as recognising you when you return to our website and helping our team to understand which sections of the website you find most interesting and useful.
Strictly Necessary Cookies
Strictly Necessary Cookie should be enabled at all times so that we can save your preferences for cookie settings.
If you disable this cookie, we will not be able to save your preferences. This means that every time you visit this website you will need to enable or disable cookies again.
3rd Party Cookies
This website uses Google Analytics to collect anonymous information such as the number of visitors to the site, and the most popular pages.
Keeping this cookie enabled helps us to improve our website.
Please enable Strictly Necessary Cookies first so that we can save your preferences!