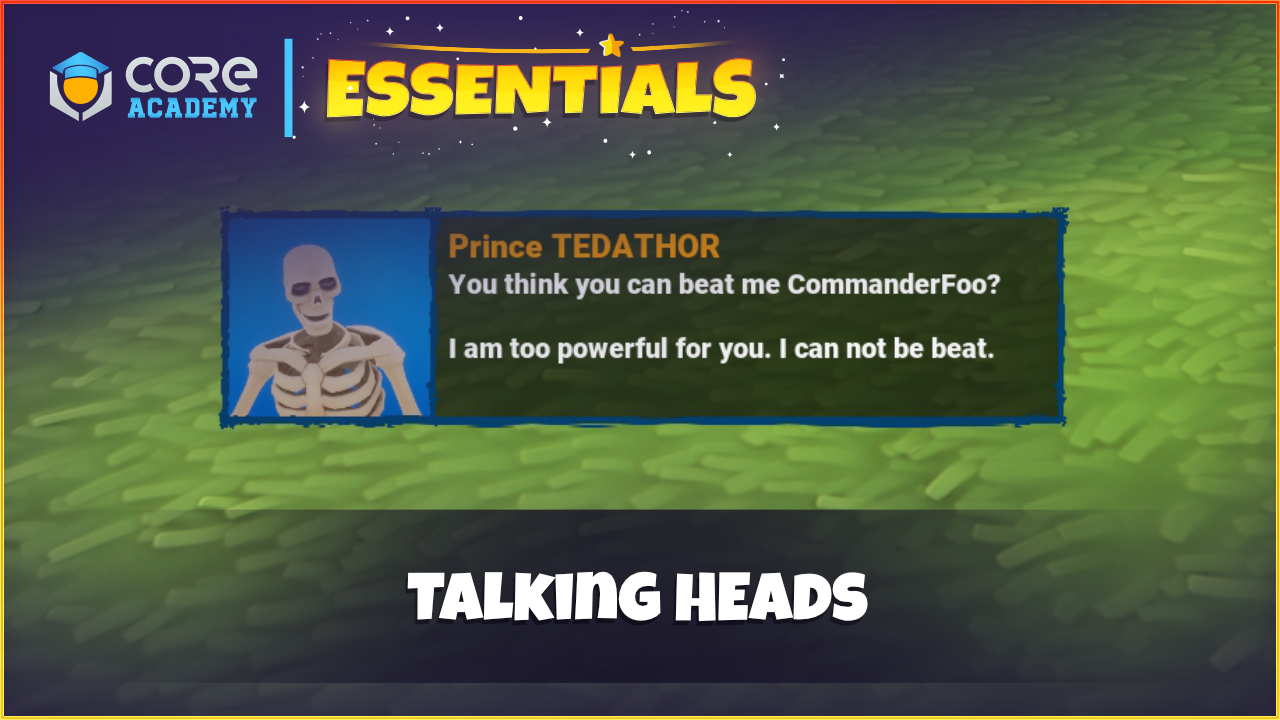
The Talking Heads component allows you to have animated actors show up in the UI that displays some dialogue to the player. This can be far more interesting to the player, as the actor can be animated to show emotion depending on what they are saying in the message.
For example, if a player interacts with an NPC and tells a joke to the player. The actor in the UI could be laughing while telling the joke.

How to use
Drag the Talking Heads template into the Hierarchy. The template comes with an example included so you can test the component out. The example template that is included can be removed from the Hierarchy if needed.
For easy interaction with an NPC, there is a trigger template that can be dropped in and customized to make interacting easier so no scripting is required.
The root of the template in the hierarchy has custom properties to customize the component.
- InCurve
The curve for the in animation of the panel.
- OutCurve
The curve of the out animation of the panel.
- InDuration
The duration of the in animation.
- OutDuration
The duration of the out animation.
- WriteText
If enabled, the text will be printed out 1 character at a time.
- CanSkipWriting
If enabled, the player can press the left mouse button (default) to skip the writing effect.
- TextSpeed
The writing speed of the text animation.
- BackgroundColor
The background color of the background behind the actor.
- LightIntensity
The light intensity of the point light behind the actor.
Creating Talking Heads
The most important part of this component is adding actors and being able to call them when needed. To make this simple, a broadcast event has been set up to make playing these dialogues as simple as possible.
To call an actor entry, you can pass the key for the entry when broadcasting to the event `Talking.Head`.
For example, to call the entry `Karl Laugh`, a broadcast like this is done:
`Events.Broadcast(“Talking.Heads”, “Karl Laugh”)`
To create actor entries, there is a data table in the Talking Heads folder in Project Content. It contains 2 examples already added.
Below are what the columns are for.
- Key
The unique key for this actor entry that is sent when broadcasting.
- Name
The actor name that will appear in the UI.
- Message
The message you want to display to the player in the UI. Messages support replacement templates.
For example, the message could be:Hello {name}, your current health is {hitpoints}.{name}
The name of the player reading the message.{hitpoints}
The current hit points of the player.{maxhitpoints}
The max hit points the player can have.{kills}
Total kills the player has.{deaths}
Total deaths the player as.
- RandomMessages
A data table of random messages this actor will pick from.
- Actor
The template to spawn that will show in the UI that represents the actor.
- PositionOffset
Custom offset that may be needed to offset the actor from the spawned position.
- Animation
The animation to play when the entry is displayed.
- AnimationDelay
The duration of how long to wait until the animation is played.
- AnimationLoop
If enabled, the animation will loop.
- Audio
The audio template to spawn when the entry is displayed. - StayDuration
How long the message will display for before sliding out. - PanelWidth
The width of the panel. - PanelHeight
The height of the panel.


Pingback: Core Academy Essentials - Core Academy