This lesson will show how to use the Core editor to create a simple Perks Shop from scratch. The player will be able to approach a nonplayer character (NPC) and interact with it to open a shop UI. The player will then be able to purchase a resource using credits. The player’s data will be saved so the amount of resources persists across different play sessions.
Note: Only creators that have joined the Perks Program will be able to use perks in the Core editor.
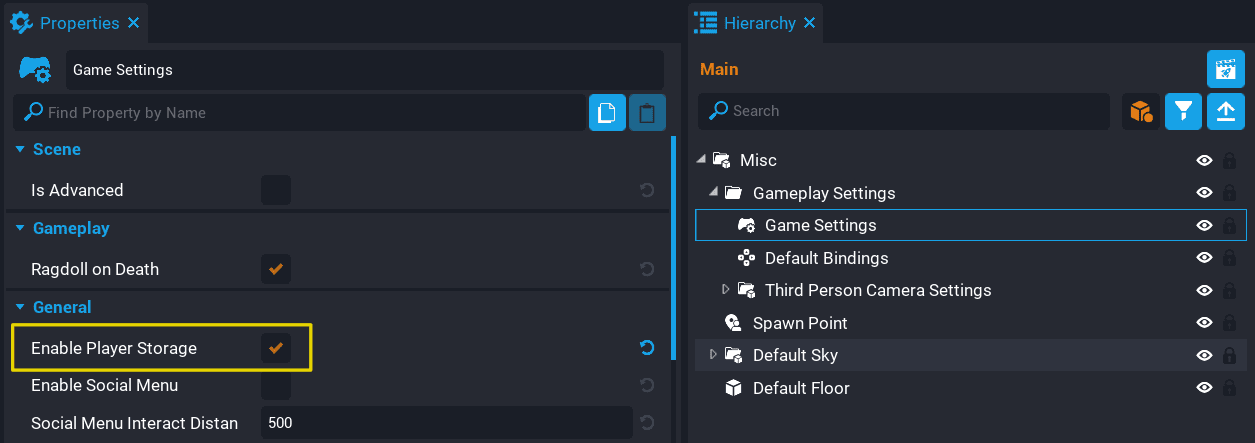
Player Storage will need to be enabled so that data can persist for the player between game sessions. For example, if a player purchases a resource perk, then this will need to be saved for the player so they don’t lose any resources they don’t use in the current game session.
Creating an NPC
The shop will be displayed when a player interacts with an NPC. Depending on your game, this could also be a Notice Board, Vending Machine, etc.
Create a New Folder
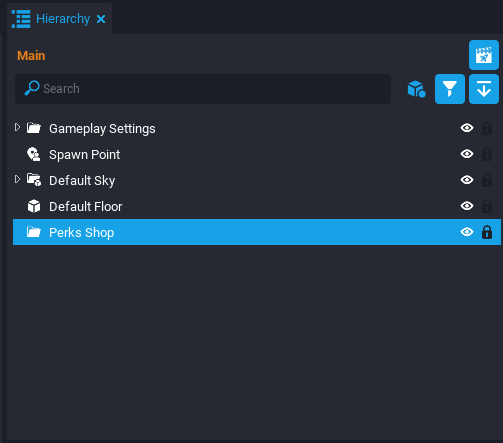
In the Hierarchy, right click near the bottom and select New Folder. Name the new folder as Perks Shop.
Note: A New Folder can also be created by using the Ctrl + N shortcut.
Create a Client Context
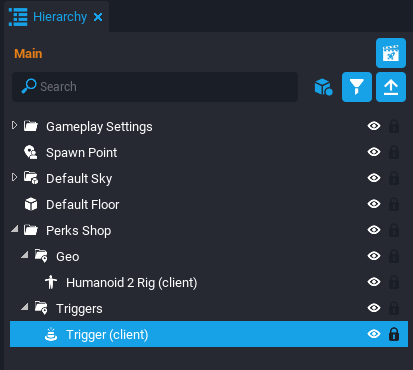
Right click the Perks Shop folder, and select the Create Network Context and then select New Client Context. Rename the client context as Geo.
Add an Animated Mesh
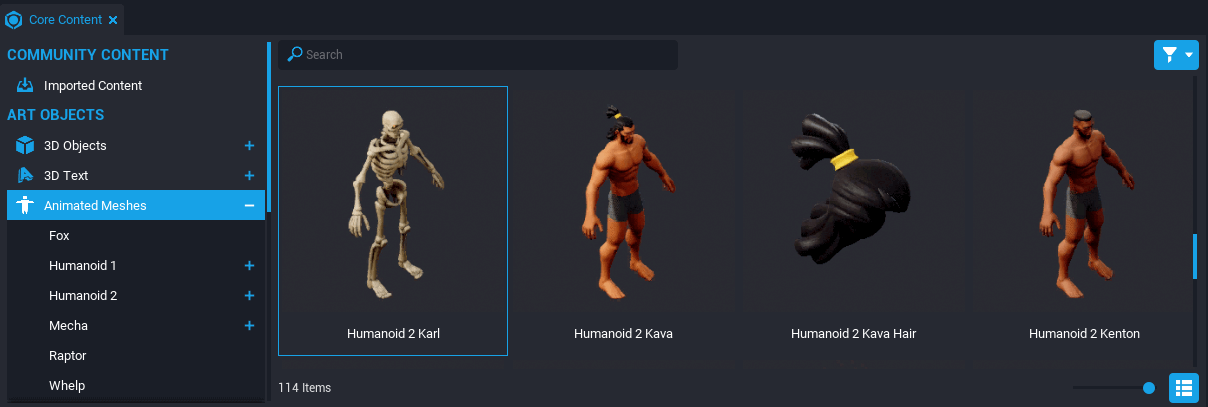
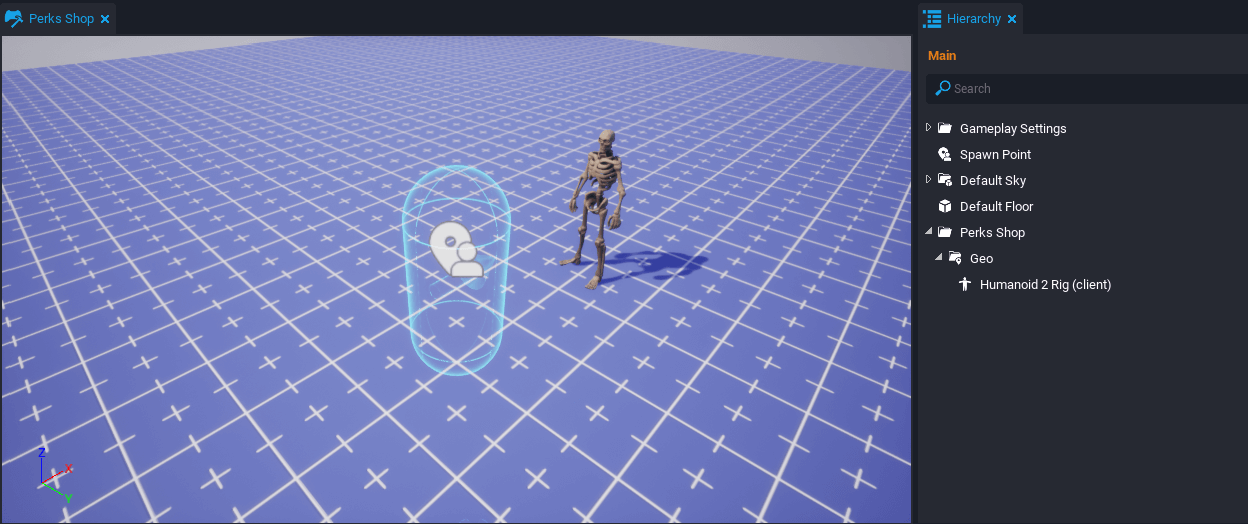
In the Core Content window, open the Animated Meshes subcategory within the Art Objects section. Find an NPC model you like and drag it into the Geo client context inside the Hierarchy.
Position and Rotate the NPC to be facing in front of the player respawn for easy testing.
Creating an Interactable Trigger
Now that an NPC is in game, you will need to have an option to interact with it. This is done using Triggers because it can detect player collision as well as display an interact option.
Add a Trigger
Start by adding a Client Context into the Perks Shop folder and rename it Triggers. Right click the Triggers group and select Create, followed by Create Gameplay Object, and finally Trigger.
Note: A trigger can quickly be added by selecting the Triggers group and clicking the 9 key.
Transform the Trigger
Select the Trigger and open the Properties window. Set the Game Collision property to Force On.
Move the trigger and scale it to represent the interactable zone in front of the NPC.
Make Trigger Interactable
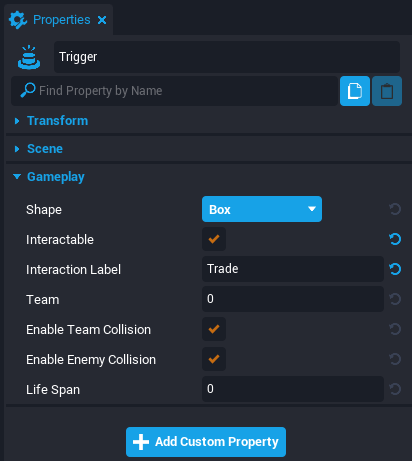
Select the Trigger and open the Properties window. Under the Gameplay section, activate the Interactable property. Then set the Interaction Label property to Trade.
Test the Trigger
The player should see the interaction label when it enters the trigger’s collision box.
Creating a Perk
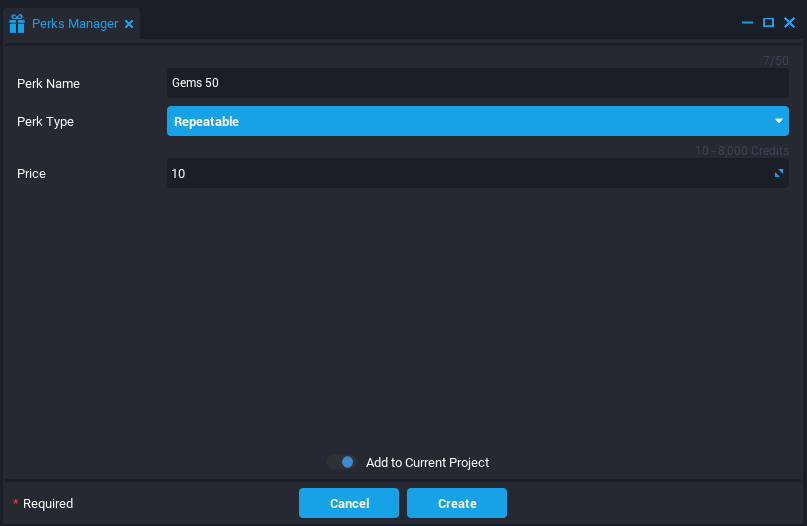
Open the Perks Manager window by clicking the top menu Window and selecting Perks Manager. Click the Create New Perk button at the bottom. Rename the perk to Gems 50. Set Perk Type to Repeatable. Click Create at the bottom to finish making the perk.
Creating a Shop UI
When the player interacts with the NPC, it will display a Shop UI so the player can use credits to buy resources. This will require adding UI objects into the Perks Shop folder.
Create a Client Context
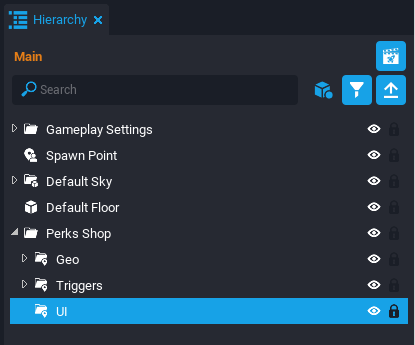
Create a Client Context inside the Perks Shop folder and rename it UI.
Create a UI Container
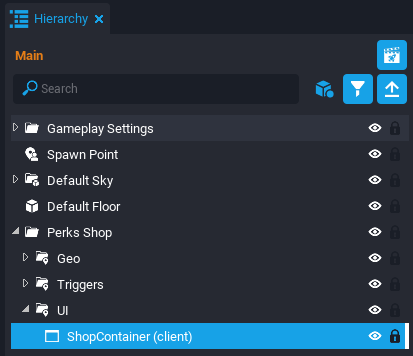
Right click the UI group and select Create, followed by Create UI Object, and then select Create UI Container. Rename it ShopContainer.
Create a UI Panel
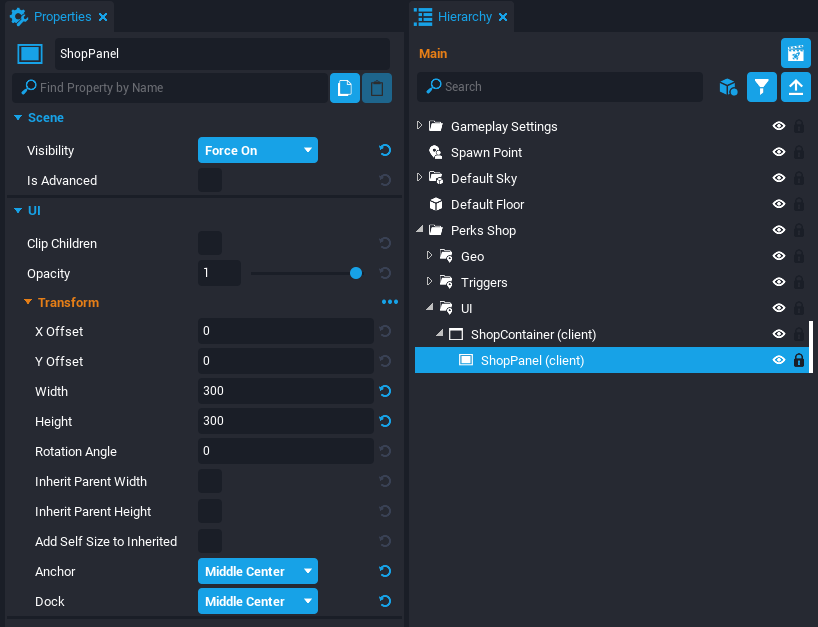
Right click the ShopContainer and select Create, followed by Create UI Object, and then select Create UI Panel. Rename it ShopPanel.
Select the ShopPanel and open the Properties window.
Set the Visibility property to Force On.
Set the Width and Height properties to 300.
Set the Anchor and Dock properties to Middle Center.
Create a Background Image
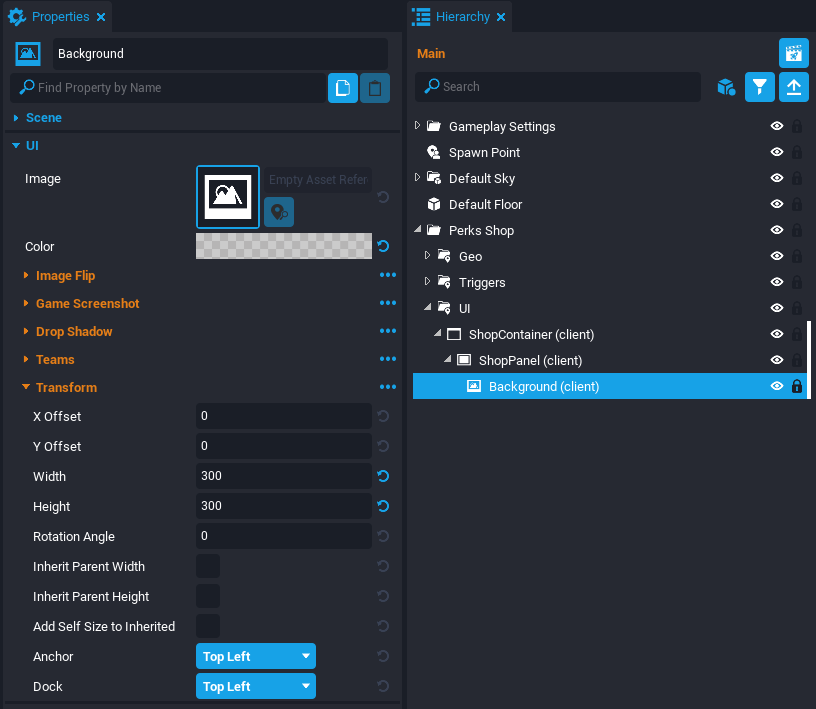
Right click the ShopPanel and select Create, followed by Create UI Object, and then select Create UI Image. Rename it Background.
Select the Background and open the Properties window. Set the Color property so it has some transparency. Also set the Width and Height properties to 300.
Create a Perks Label
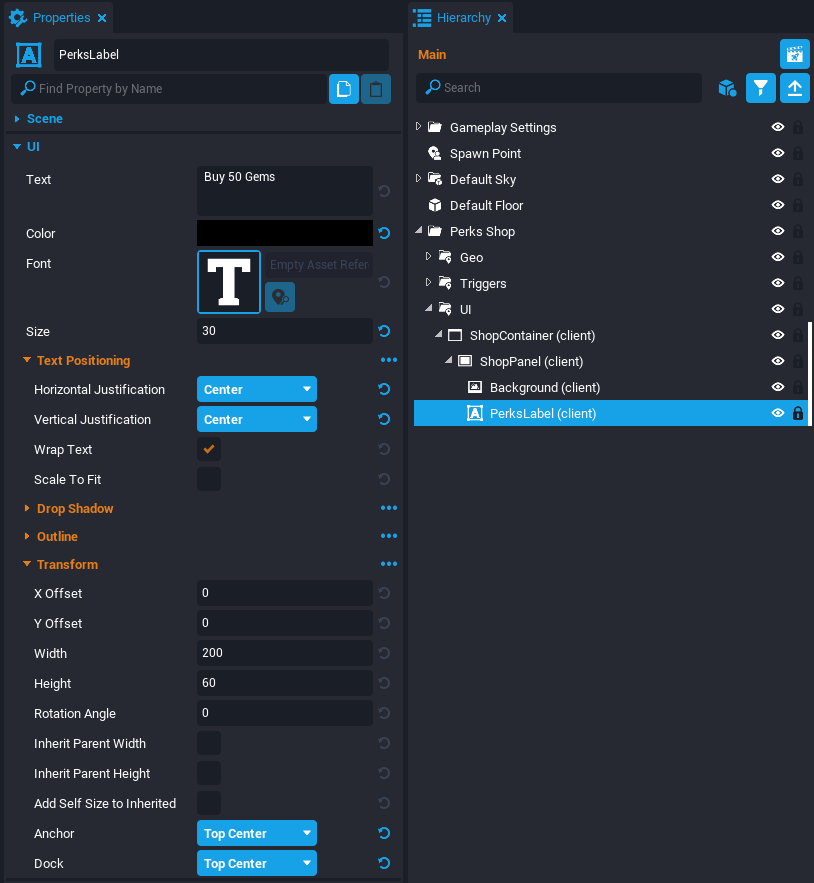
Right click the ShopPanel and select Create, followed by Create UI Object, and then select Create UI Text. Rename it PerksLabel.
Select PerksLabel and open the Properties window.
Set the Text property to Buy 50 Gems.
Set the Color property to black.
Set the Size property to 30.
Set Horizontal Justification and Vertical Justification properties to Center.
Set Anchor and Dock properties to Top Center.
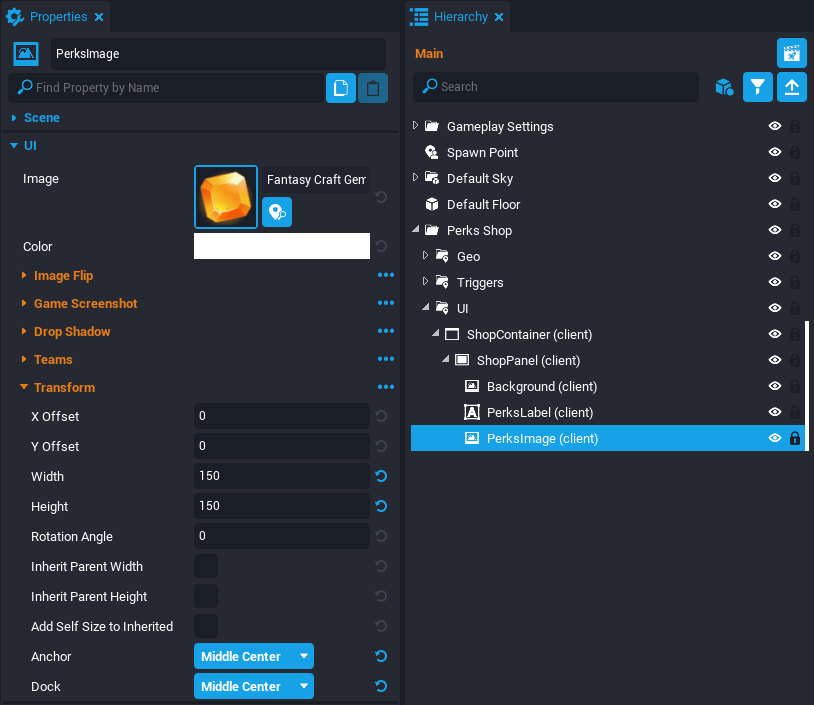
Create a Perks Image
Right click the ShopPanel and select Create, followed by Create UI Object, and then select Create UI Image. Rename it PerksImage.
Select PerksImage and open the Properties window.
Set the Image property to Fantasy Craft Gem 001.
Set the Width and Height properties to 150.
Set the Anchor and Dock properties to Middle Center.
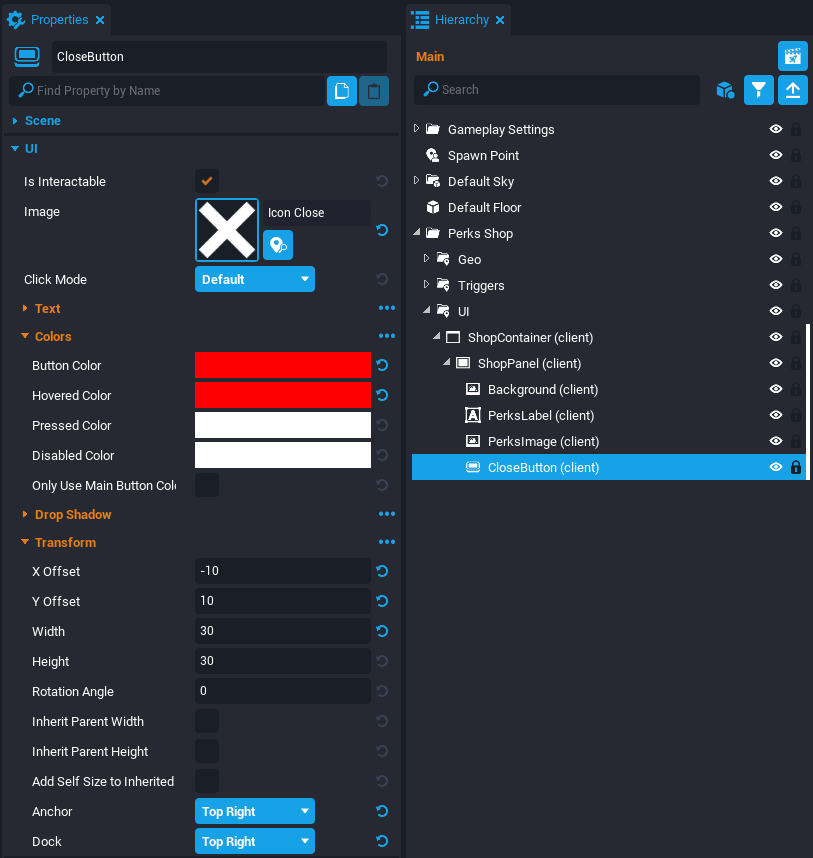
Create a Close Button
Right click the ShopPanel and select Create, followed by Create UI Button, and then select Create UI Image. Rename it CloseButton.
Select CloseButton and open the Properties window.
Set the Image property to Icon Close
Set the Button Color and Hovered Color properties to red.
Set the X Offset property to -10.
Set the Y Offset property to 10.
Set the Width property to 30.
Set the Anchor and Dock properties to Top Right.
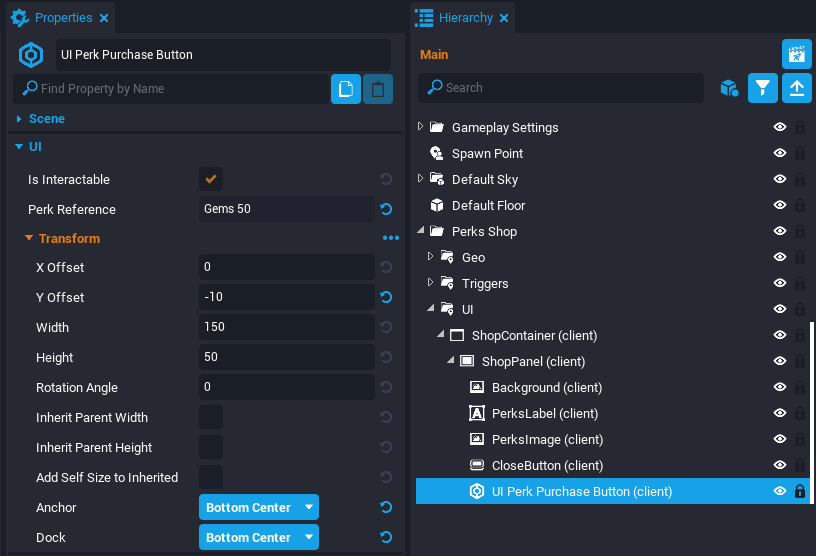
Create a UI Perk Purchase Button
Right click the ShopPanel and select Create, followed by Create UI Button, and then select Create UI Perk Purchase Button.
Select the UI Perk Purchase Button and open the Properties window.
Drag and drop the Gems50 perk reference from the Perks Manager window into the Perk Reference property.
Set the Y Offset property to -10.
Set the Anchor and Dock properties to Bottom Center.
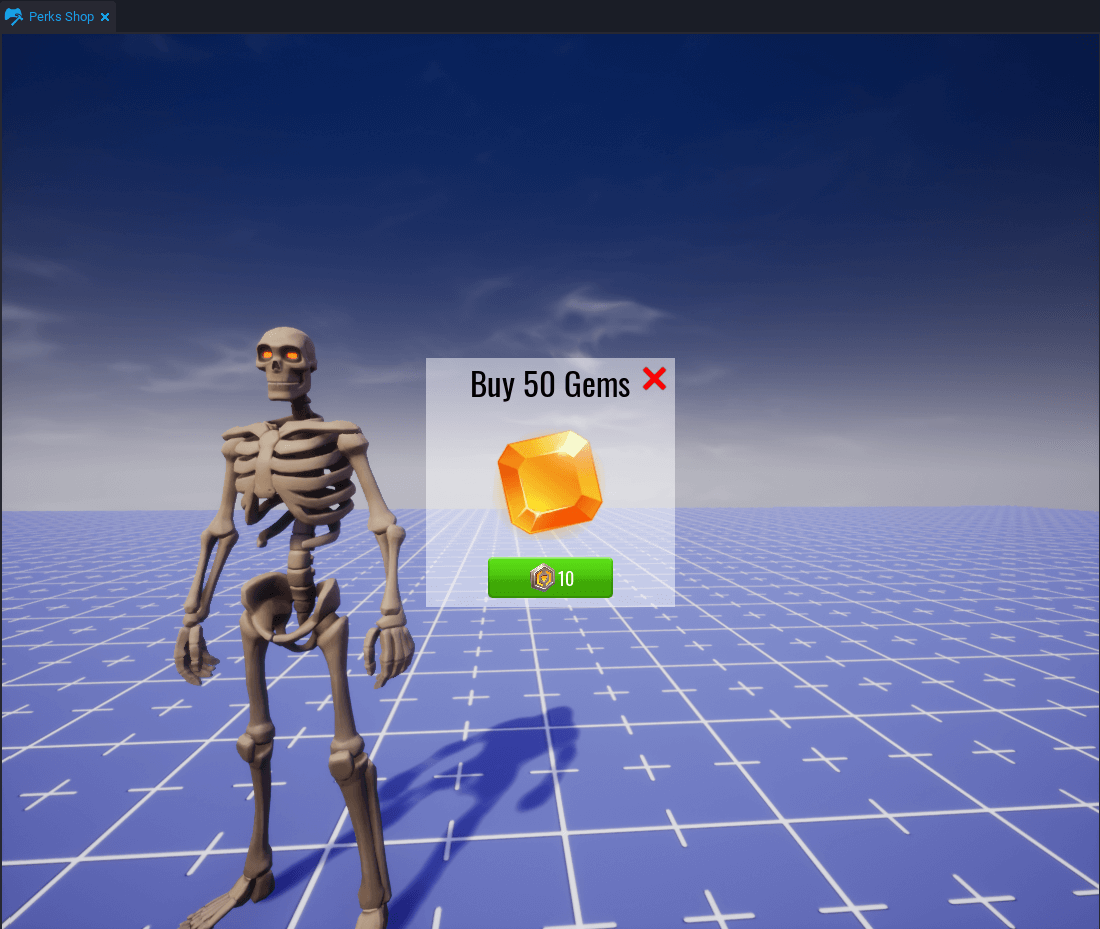
Test the Perks Shop
Play the game and see if the Shop UI shows up and looks correct.
After, select the UI Panel and set the Visibility property to Force Off.
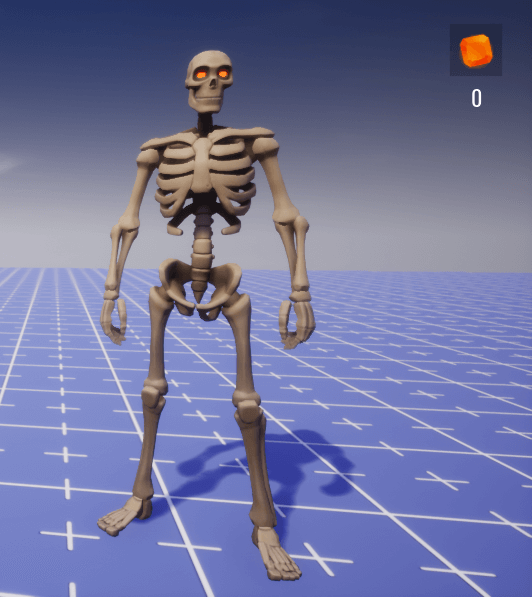
Creating a Resource Display
A Resource Display will show how much the player currently has of a certain resource. This will be easy to implement and good to see if a perk purchase is increasing the resource amount.
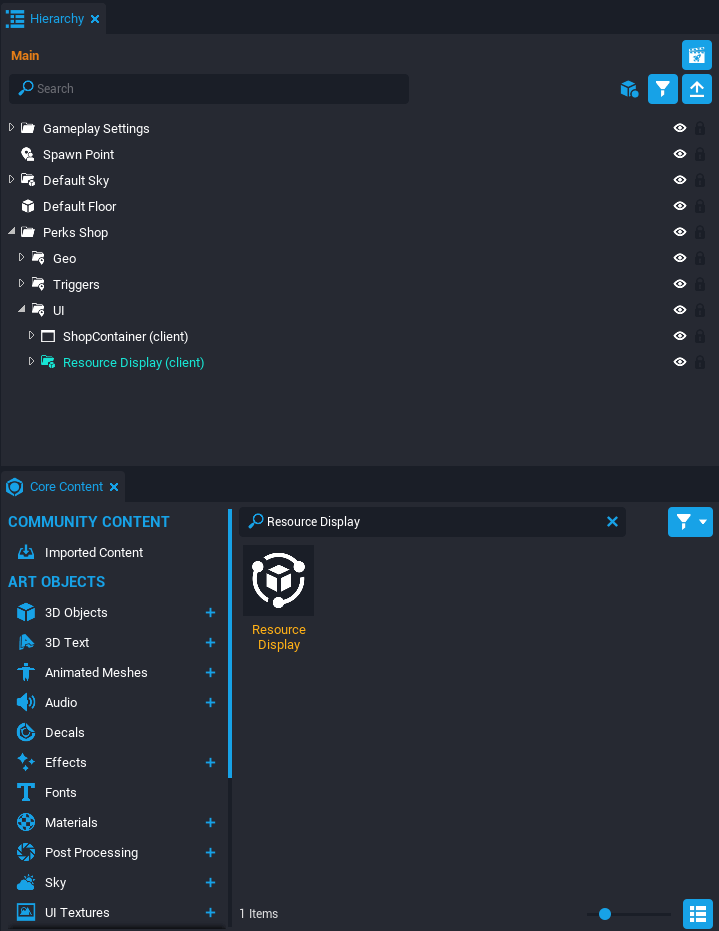
Add a Resource Display
Open the Core Content window and search for Resource Display. Drag and drop the Resource Display into the UI folder. Right click the Resource Display and select Deinstance This Object.
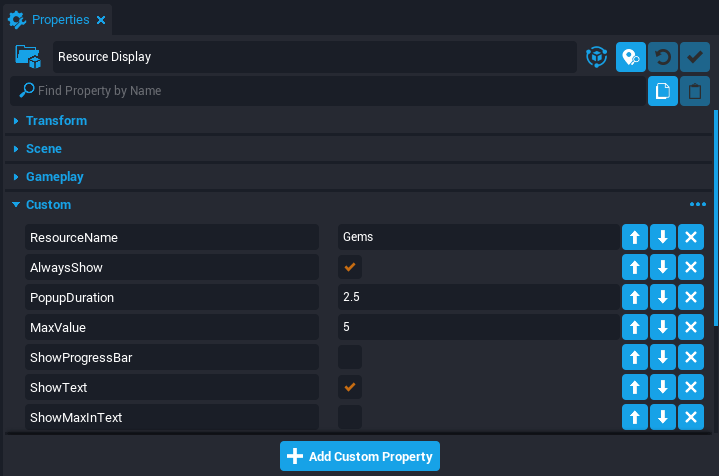
Set Display to Always Show
By default, the display will disappear after a couple seconds. Select Resource Display and open the Properties window. Activate the AlwaysShow custom property.
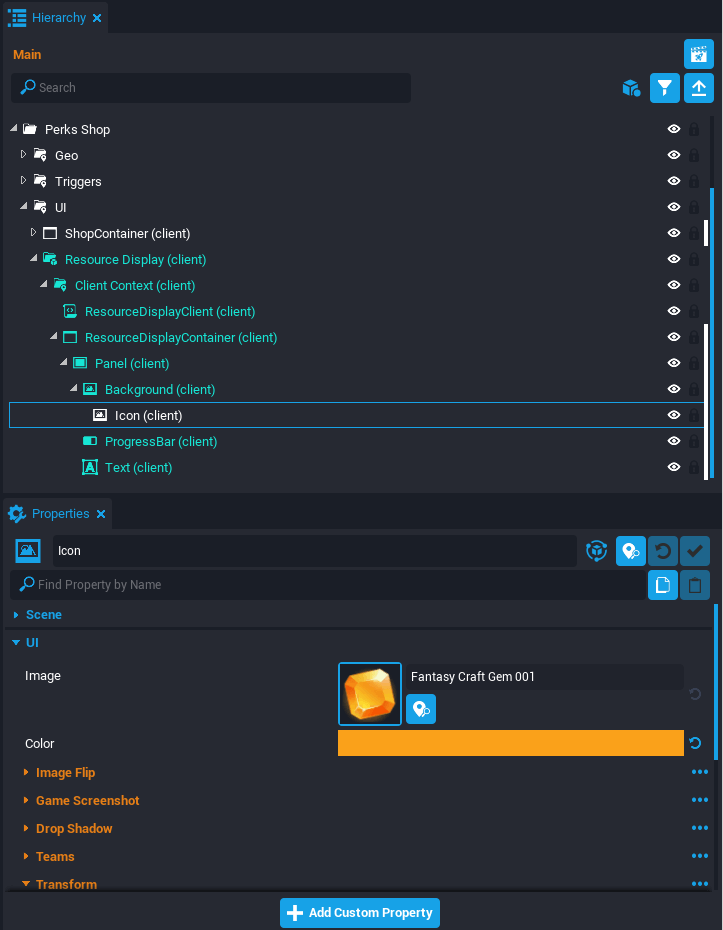
Set the Icon Image
Expand the Resource Display folders until you find a UI Image object named Icon. Select Icon and open the Properties window. Set the Image property to Fantasy Craft Gem 001.
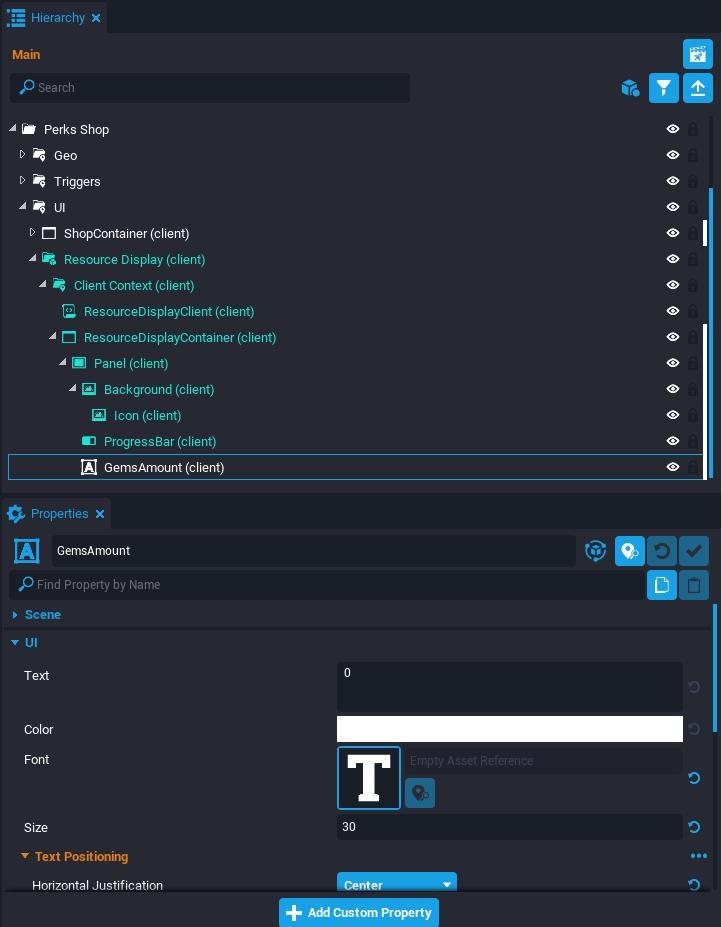
Set the Icon Text
Select the Text object inside the Panel group. Rename it to GemsAmount using the F2 shortcut. Select it once again and open the Properties window. Set the Text property to 0 and the Size property to 30.
Displaying the Shop UI
The Shop UI is not visible when starting the game. When the player interacts with the NPC, then the Shop UI should appear. This requires using a Lua script to toggle the Shop UI depending on certain events.
Add a Client Script
Toggling the Shop UI will be handled client-side so we will create a script in Client Context.
In the Hierarchy, right click the Perks Shop folder and select New Folder.
Rename the folder to Scripts.
Right click the Scripts folder and select Create Network Context, then select Create Client Context.
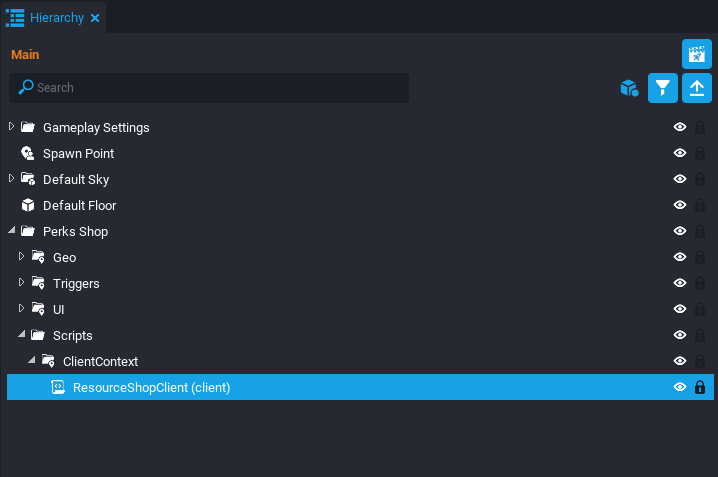
Right click the ClientContext and select Create, select Create Script, and then select Create New Script.
Rename the script to ResourceShopClient.
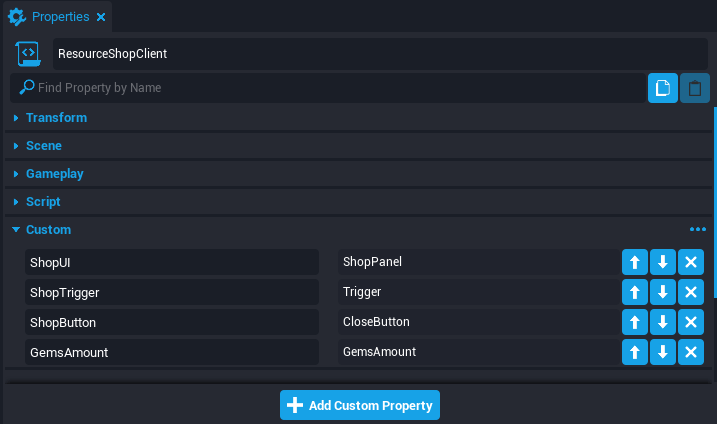
Add Custom Properties
The ResourceShopClient script needs references to a few things, so you will need to set up some custom properties.
Add the ShopPanel as a custom property. Rename the property ShopUI.
Add the Trigger as a custom property. Rename the property ShopTrigger.
Add the CloseButton as a custom property. Rename the property ShopButton.
Add the GemsAmount text from the Resource Display as a custom property.
Create Shop UI Variables
Open the ResourceShopClient script.
Create these variables so you have a reference to the shop UI components.
local SHOP_UI = script:GetCustomProperty("ShopUI"):WaitForObject()
local SHOP_TRIGGER = script:GetCustomProperty("ShopTrigger"):WaitForObject()
local SHOP_BUTTON = script:GetCustomProperty("ShopButton"):WaitForObject()
local GEMS_AMOUNT = script:GetCustomProperty("GemsAmount"):WaitForObject()Code language:JavaScript(javascript)
The inTrigger variable will be used to determine if the player is in the trigger or not
local localPlayer = Game.GetLocalPlayer()
local inTrigger = falseCode language:JavaScript(javascript)
Create CloseUI Function
The CloseUI function will be responsible for closing the UI when the clickedEvent listener for SHOP_BUTTON is fired, and when the player leaves the SHOP_TRIGGER volume.
If the player closes the shop UI, they could still be inside the trigger volume, so you don’t want to turn off the interaction label, otherwise the player would need to leave the trigger volume, and enter again.
Create OnInteracted Function
The OnInteracted function will be called when the player interacts with the SHOP_TRIGGER. The function will check to make sure inTrigger is true, indicating that the player is inside the SHOP_TRIGGER volume.
The last part of the if condition checks to see if the obj that has entered the SHOP_TRIGGER is the local player.
Create OnExitTrigger Function
The OnExitTrigger will check if the local player has exited the SHOP_TRIGGER volume and close the shop UI. The inTrigger variable is set to false so that the interaction label is turned off.
The OnEnterTrigger will check when the local player has entered the SHOP_TRIGGER volume and turn on interaction so the label will show up for the player. The inTrigger variable is set to true, indicating the player is inside the SHOP_TRIGGER volume.
The UpdateResources will check which resource has changed, and update the text value for the resource that was updated. This will allow the player to see how much of a resource they have.
Connect the OnInteracted function to the interactedEvent for the SHOP_TRIGGER. When trigger is interacted with, it will show or hide the UI for the player.
Connect the OnExitTrigger function to the endOverlapEvent for the SHOP_TRIGGER. When the player exits the trigger volume, it will automatically close the UI for the player.
Connect the OnEnterTrigger function to the beginOverlapEvent for the SHOP_TRIGGER. When the player enters the trigger volume, it will enable the interaction label for the player, so they can open the UI.
You need to know when a resource has changed so the UI can be updated. When a player’s resource has changed using functions such as AddResource, SetResource, and RemoveResource, the resourceChangeEvent will be fired, allowing you to check which resource has changed, and to update the UI with the new amount.
Trigger interaction label is visible when entering the trigger volume.
Trigger interaction label is not visible when exiting the trigger volume.
Shop UI opens when pressing F.
Shop UI closes when clicking on the close button.
Shop UI closes when the player leaves the trigger volume.
Shop Item can be purchased.
Note: The resource amount will not be changing yet. This will happen once we implement server side scripts.
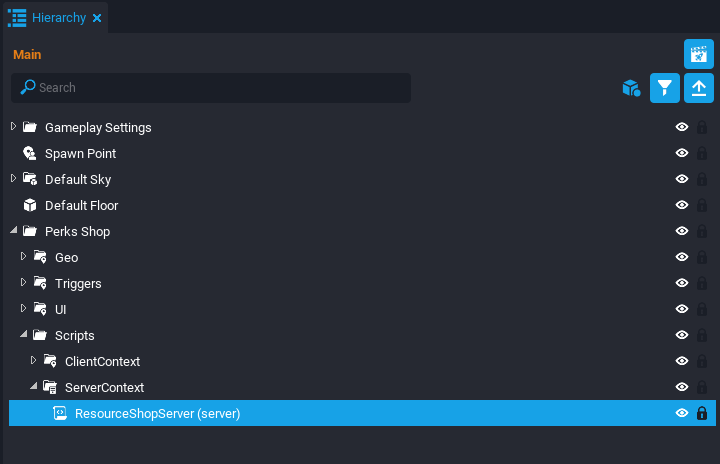
Create ResourceShopServer Script
Create a new Server Context inside the Scripts folder. Then create a new script called ResourceShopServer, and place it into the ServerContext. The ResourceShopServer script will be responsible for updating the player resources, and later on saving to player storage to persist the player’s resources.
Note: The code in this script will use tables and loops to make adding more perks easier.
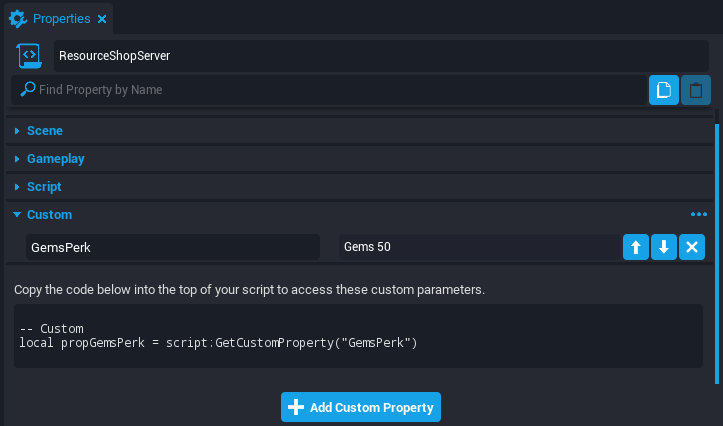
Create Custom Property for Perk
The ResourceShopServer needs a reference to the resource perks. Open the script’s Properties window and the Perks Manager window. Add the Gems50 Perk as a custom property. Name the property GemsPerk.
Create Perks Table
Open the ResourceShopServer script.
The PERKS table contains an entry for each resource perk which also includes some data. Storing them in a table like this will be easier when you have multiple perks and need to persistently store them.
The resource key that will be used for adding / setting the resource for the player.
resourceAmount
The amount to give to the player when they purchase the resource perk.
storageKey
The key used in the table that will be stored in player storage.
Create GetPerkData Function
The GetPerkData will loop through the PERKS table to find a perk that matches the perk parameter that is passed in.
local functionGetPerkData(perk)
fori, datainipairs(PERKS) doifdata.perk == perkthenreturndataendendreturnnilendCode language:JavaScript(javascript)
Create PerkChanged Function
The PerkChanged function is the listener that will be fired when the player has purchased a resource perk. The perk parameter will be the perk the player purchased, which can be used to lookup the perk data from the PERKS table.
Test the game and make sure purchasing a perk updates the amount in the UI.
Store Player Resources Persistently
The resources that the player purchases need to be stored persistently so that in the next session, the game will load from storage the amount of resources the player has.
Update ResourceShopServer Script
You will need to make some changes to a few of the functions in the ResourceShopServer script so the player’s resources are loaded and saved to player storage.
Update PerkChanged Function
Update the PerkChanged function to add support for player storage.
local function PerkChanged(buyer, perk)
    local perkData = GetPerkData(perk)
    local playerData = Storage.GetPlayerData(buyer)

    if perkData ~= nil then
        buyer:AddResource(perkData.resourceKey, perkData.resourceAmount)

        if not playerData[perkData.storageKey] then
            playerData[perkData.storageKey] = 0
        end

        playerData[perkData.storageKey] = playerData[perkData.storageKey] + perkData.resourceAmount

        Storage.SetPlayerData(buyer, playerData)
    end
end
Each time a perk has been purchased, the player’s storage data is loaded and stored in the playerData variable. This will be a table, even if there is no data stored.
local playerData = Storage.GetPlayerData(buyer)
Check to see if the storageKey for the perk exists in the player’s data. If it doesn’t, create it and set the resource value to 0. This is done to make sure there is a valid entry for the perk in the playerData table.
if not playerData[perkData.storageKey] then
    playerData[perkData.storageKey] = 0
end
Update the value in the table with the amount the player has just purchased.
The OnJoined function needs to be updated, so that when the player joins, the PERKS table is looped over and sets the player’s resource for the perk on that iteration of the loop.
local functionOnJoined(player)
localplayerData = Storage.GetPlayerData(player)
fori, datainipairs(PERKS) doplayer:SetResource(data.resourceKey, playerData[data.storageKey] or 0)
endplayer.perkChangedEvent:Connect(PerkChanged)
endCode language:JavaScript(javascript)
The final thing left to do is update the ResourceShopClient script.
This code will loop over all the local player’s resources, and update the resource in the UI. The reason for this, is that when the resources get set on the server when the player joins the game, the resourceChangeEvent for the client may not be connected yet.
for key, value in pairs(localPlayer:GetResources()) do
UpdateResources(localPlayer, key, value)
endCode language:JavaScript(javascript)
Leaving and rejoining the game loads the resources from storage.
Test in multiplayer preview.
Conclusion
This lesson showed how to implement a single perk into a game using a shop interface. It also demonstrated player data persisting in different game sessions. The code can be expanded to manage multiple perks. A Perk Shop should have multiple options because players will have different prices they are willing to pay.
Learn More
The Perks Tutorial is a similar lesson but has more perks and examples such as VIP ranks and Tip Jars.
This website uses cookies so that we can provide you with the best user experience possible. Cookie information is stored in your browser and performs functions such as recognising you when you return to our website and helping our team to understand which sections of the website you find most interesting and useful.
Strictly Necessary Cookies
Strictly Necessary Cookie should be enabled at all times so that we can save your preferences for cookie settings.
If you disable this cookie, we will not be able to save your preferences. This means that every time you visit this website you will need to enable or disable cookies again.
3rd Party Cookies
This website uses Google Analytics to collect anonymous information such as the number of visitors to the site, and the most popular pages.
Keeping this cookie enabled helps us to improve our website.
Please enable Strictly Necessary Cookies first so that we can save your preferences!