Now that basic vector information has been covered, it’s time to put them to use in Core. Return to the Core Editor and open up the Escape the Room project.
Overview
This demo will show how to access the player position and apply vector math to the position vector.
Create a New Script
In the Hierarchy, create a Client Context to the Scripts folder. Then create a new script named VectorsDemo and place it in the Client Context.
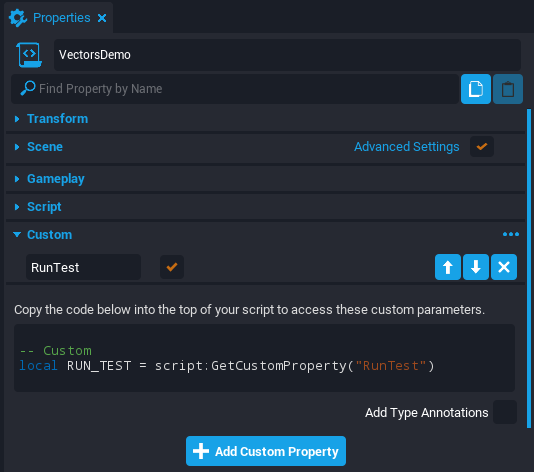
Add a Custom Property
Open the Properties window with the VectorsDemo script selected. Add a new custom property of the type Bool and name it RunTest. This property will run the code if active, so make sure to activate the property once it is created.
Player Position Vector
From a client script, the Game namespace has a function to get the local player object. A Player object has a function to access the position vector. The CoreDebug namespace can then visually display a sphere at a given position. To constantly redraw the sphere at the player’s position, a Tick function will keep the logic going forever.
Open up the VectorsDemo script. Add the following code to display a circle at the player’s position.
local RUN_TEST = script:GetCustomProperty("RunTest")
local player = Game.GetLocalPlayer()
functionTick()ifnot RUN_TEST thenreturnendlocal playerPosition = player:GetWorldPosition()
CoreDebug.DrawSphere(playerPosition, 20, {color = Color.YELLOW})
endCode language:Lua(lua)
Preview the Project
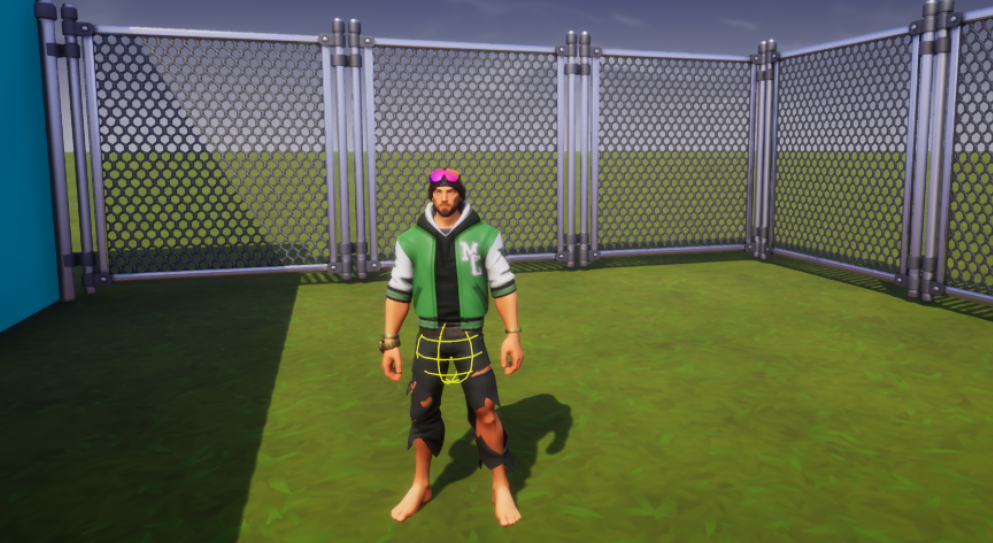
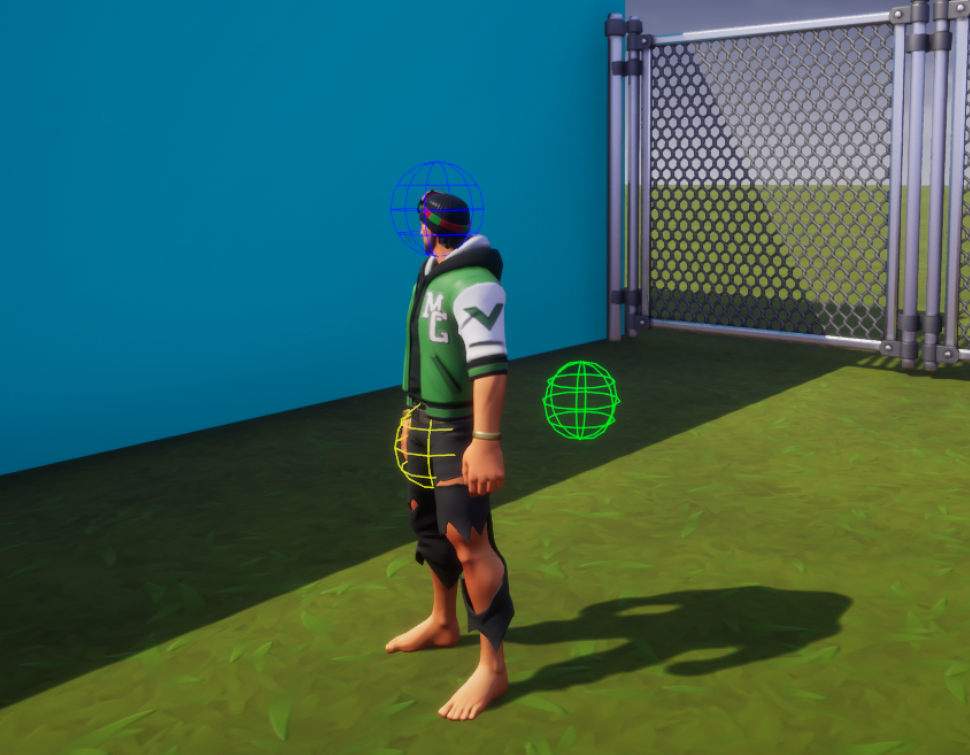
The yellow sphere should now follow the player.
The player’s position is the center point of the body.
The Head Position
The player’s head position can be calculated by adding an upward vector to the player’s midpoint position. A player is roughly 2 meters tall in Core, so 100 (centimeters) needs to be added to the z component.
Add the following code right after drawing the yellow debug sphere inside the Tick function:
local upwardVector = Vector3.New(0, 0, 100)
local headPosition = playerPosition + upwardVector
CoreDebug.DrawSphere(headPosition, 20, {color = Color.BLUE})Code language:Lua(lua)
Preview the Project
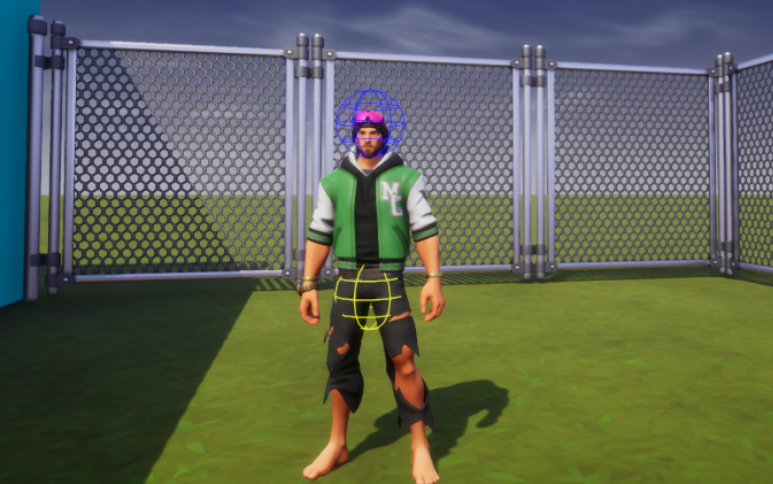
There should now be a blue sphere at the player’s head position.
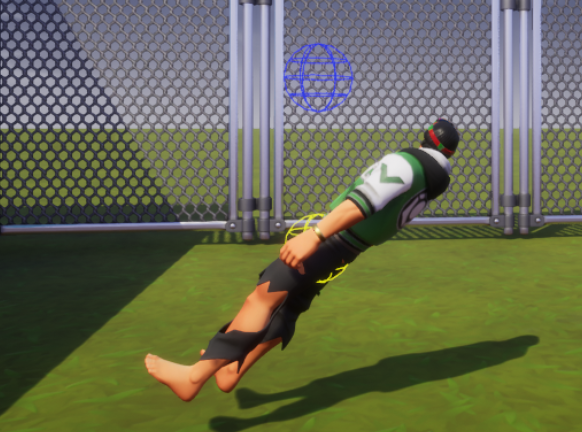
Global Space
The world coordinates are constant directions independent from other objects. This is known as global space. For example, if the player was rotated, then the blue sphere would not be on the head anymore. This is because the upward vector is in global space and does not care about the player’s rotation.
North Star
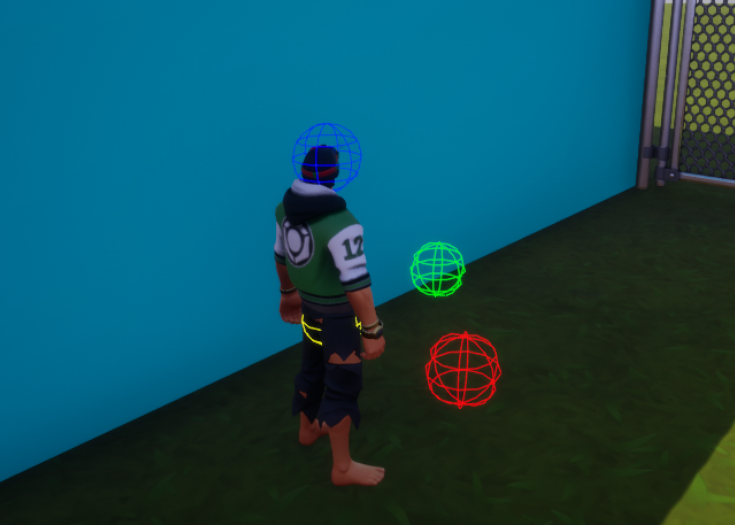
To demonstrate global space even further, let’s add a sphere that is always “north” of the player. North is the global space forward direction that will never change.
Add the following code right after drawing the blue debug sphere inside the Tick function:
For equations with multiple operators, the order of operations is the same as regular math. So the first line of code will multiply the vector by the number before the vector addition.
Preview the Project
There should now be a red sphere to the east of the player.
Cleanup
Select the VectorsDemo script and open the Properties window. Deactivate the RunTest property so the debug spheres do not appear anymore.
This website uses cookies so that we can provide you with the best user experience possible. Cookie information is stored in your browser and performs functions such as recognising you when you return to our website and helping our team to understand which sections of the website you find most interesting and useful.
Strictly Necessary Cookies
Strictly Necessary Cookie should be enabled at all times so that we can save your preferences for cookie settings.
If you disable this cookie, we will not be able to save your preferences. This means that every time you visit this website you will need to enable or disable cookies again.
3rd Party Cookies
This website uses Google Analytics to collect anonymous information such as the number of visitors to the site, and the most popular pages.
Keeping this cookie enabled helps us to improve our website.
Please enable Strictly Necessary Cookies first so that we can save your preferences!