In this section, you will create a new scene that will be used to create the tiles. A new scene is used so the tiles can be placed into the world to see how the tiles would look before they are used. This will allow for quick iteration of the tiles by going back to the scene to adjust them, and updating their templates.
Create a Scene
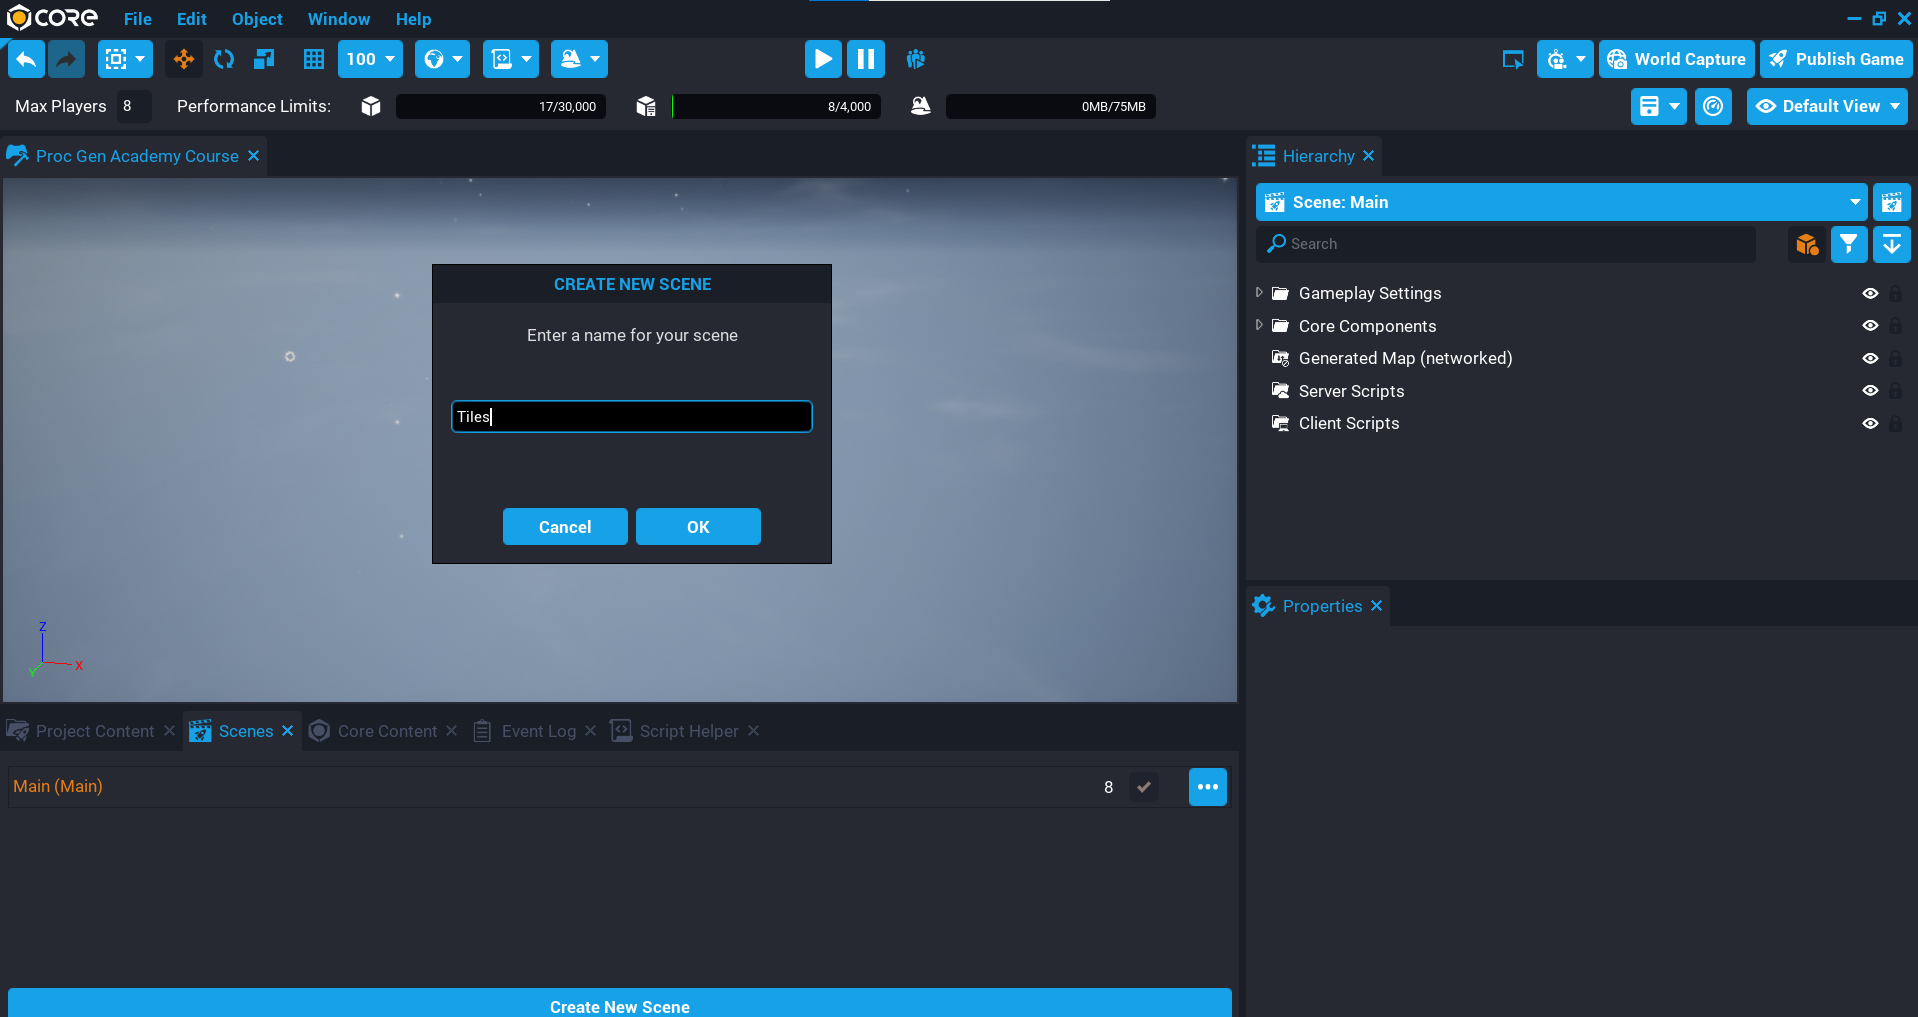
There are a few ways to create a new scene, one way is to click the Window menu and select Scenes. This will open up the Scenes window which will list all the current scenes in your project, and indicate which scene is loaded and which is the main scene of the project. From the Scenes window, click the Create New Scene button and call the scene Tiles.
When the scene has been created, Core will ask if you would like to load your new scene, select Load. You will then be loaded into the Tiles scene which will look like an empty project. All the content in Project Content is still available to use, and switching back to the main scene is as easy as clicking on the name of the scene in the Scenes window.
Creating Prototype Tiles
You will create some basic prototype tiles that will be used to generate the map. You don’t want to spend too much time making pretty art until you know how the map generation is going to work. Once you have a better idea, you can then come back and work on making the art look much nicer.
You will need 2 basic tiles to get started:
- A floor tile so the player can stand on it to move around. A floor tile is useful here because then you can have missing floor tiles that could be a trap or a hole with spikes at the bottom.
- A wall tile to surround the map and create rooms.
All tiles are going to be based on a 1 x 1 x 1 scale cube for now. Keeping these tiles the same size will be easier when building the algorithm to create the map.
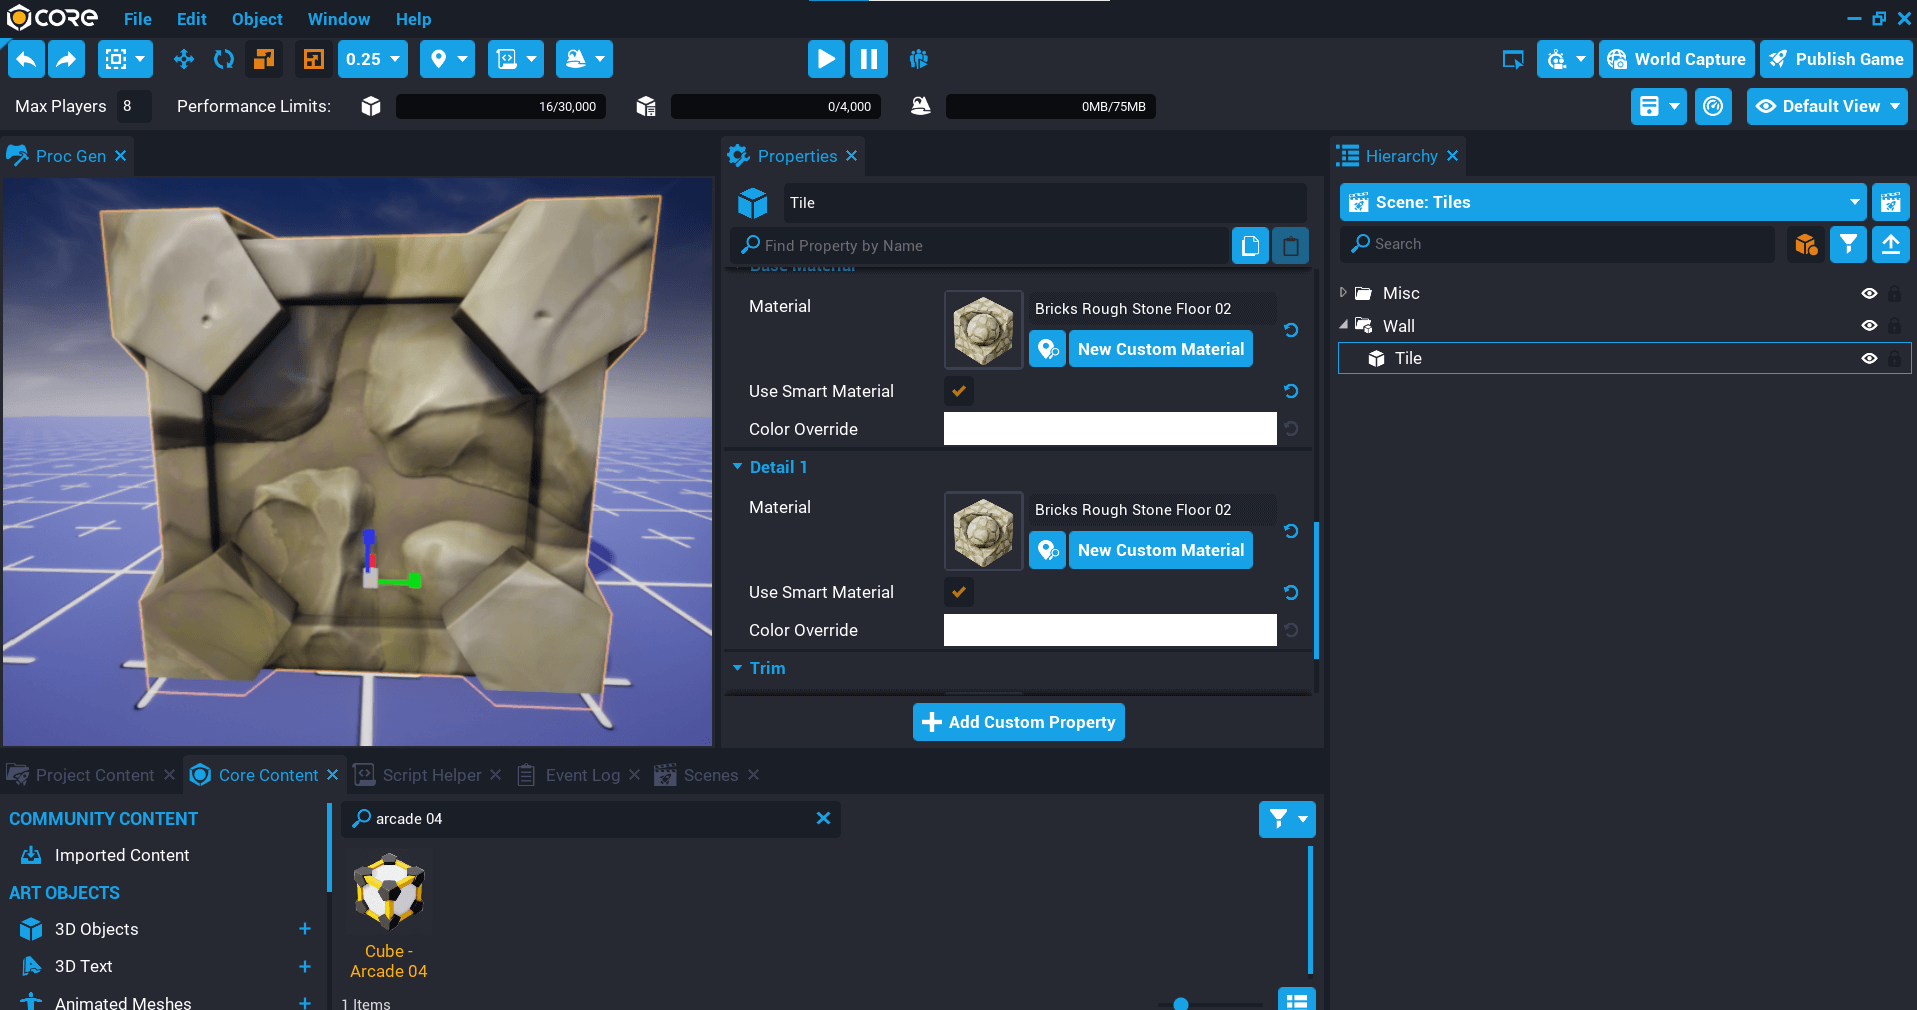
Create a Wall Tile
- Create a new group in the Hierarchy and name it
Wall. - In Core Content search for
arcade 04 to find Cube – Arcade 04. Add it to the Wall group in the Hierarchy as a child, and name it Tile. - Adjust the materials and color of the Tile to suit the look you want.
- Right-click on the Wall group and select New Template From Object, call the template
Wall. - In Project Content, move the Wall template into the My Tiles folder under My Templates.
Tile Rotation
If the children of the tile have been rotated, then you will need to be aware of this for later on in the course, because you will be spawning these tiles and rotating them based on direction checks.
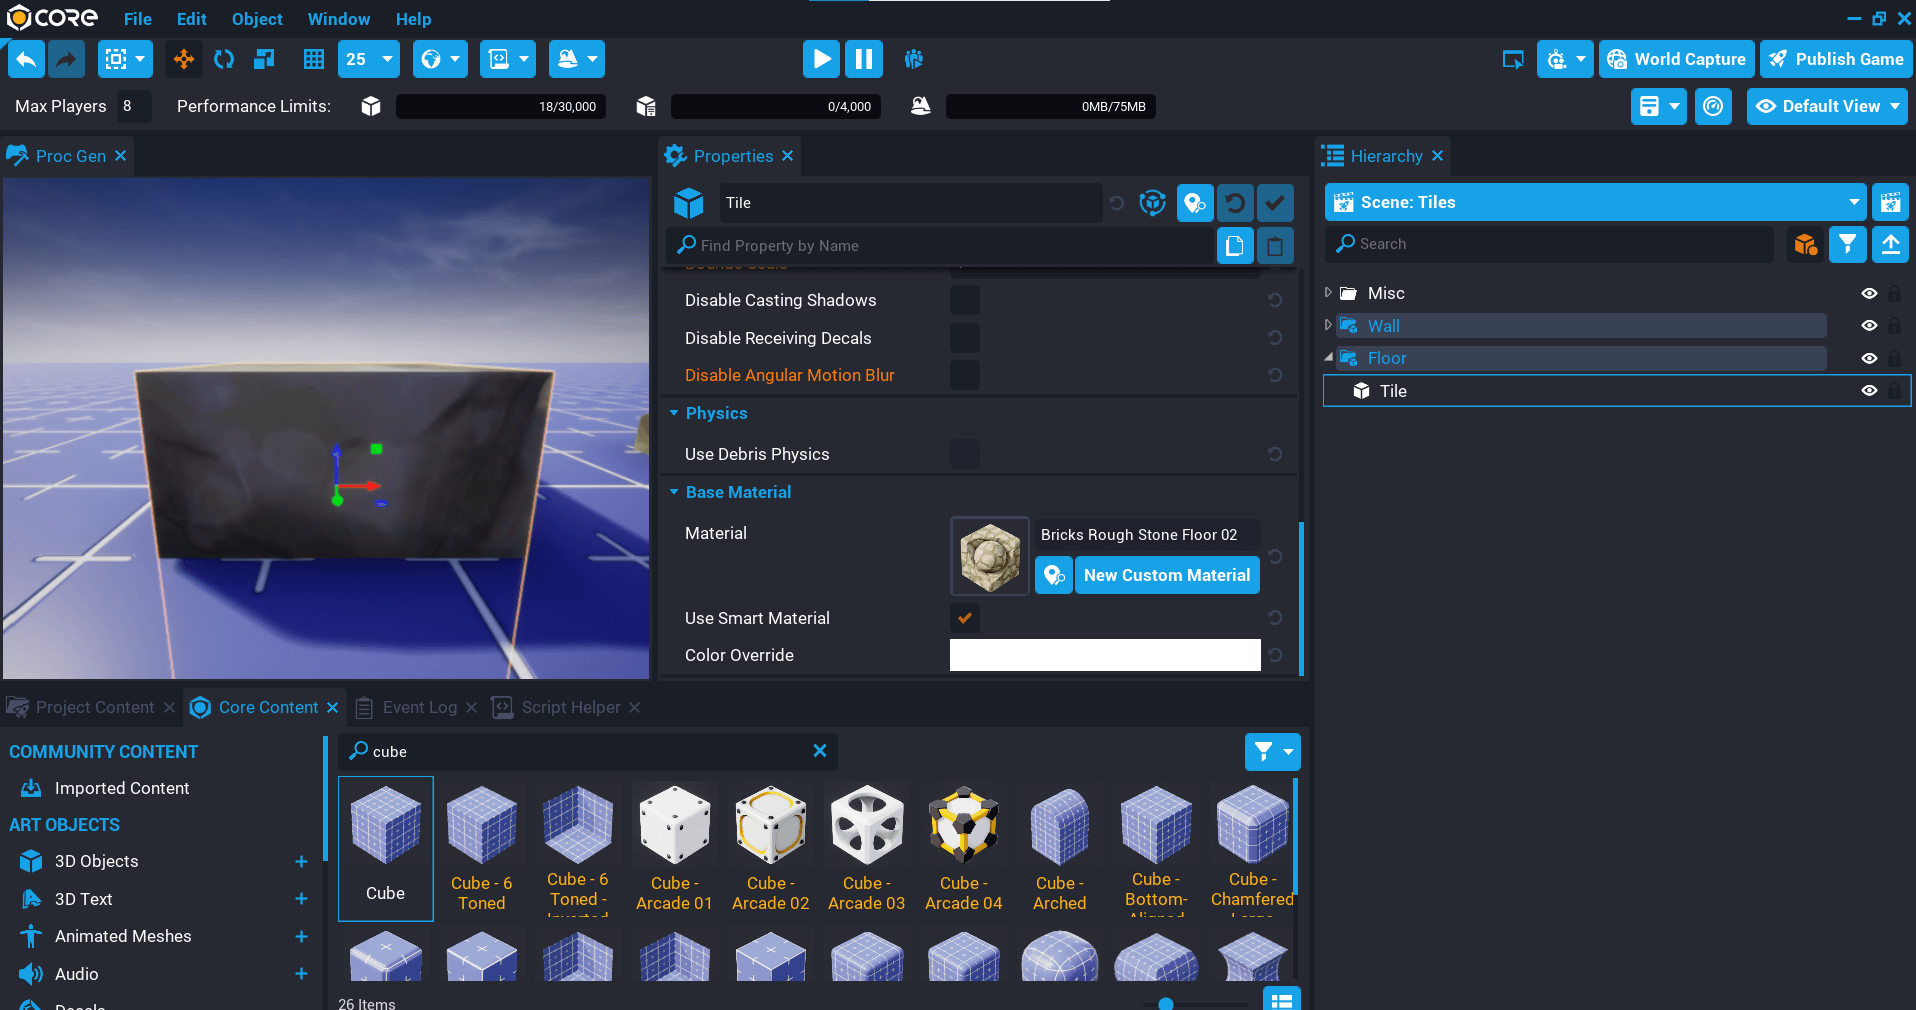
Create Floor Tile
- Create a new group in the Hierarchy and name it
Floor. - In Core Content add a Cube to the Floor group in the Hierarchy as a child, and name it
Tile. - Adjust the materials and color of the Tile to suit the look you want.
- Right-click on the Floor group and select New Template From Object, call the template
Floor. - In Project Content, move the Floor template into the My Tiles folder under My Templates.